In Part One of this blog we set the stage to select quality trees by starting with a good specification, working within the normal project submittal process, and resetting our expectation of what constitutes a good quality tree. The requirements for inspecting the parts of the tree aboveground were reviewed. For the inspection of the parts of the tree belowground, adopting a plant specification that supports the quality standards to be enforced is no less critical. As with Part One, a specification and supporting plant details produced by the Urban Tree Foundation are the basis for the following recommendations.
Today we’ll discuss the inspection of the critical parts of the tree at and below the ground. This level of inspection is not typically performed by landscape architects but is a very critical part of plant quality control. This is the part of the process that requires more commitment, time, and dialogue with both the grower and contractor. It will typically double the time it takes to select trees but may be the most important time you spend relative to the outcome of the project.
Identifying the trunk flare
Finding the trunk flare is the critical task of the inspection below ground.
Make sure that you understand the difference between a trunk flare and the swelling that results from the grafting process. Many trees are grafted, a process by which the grower can guarantee, for example, that a maple is an October Glory Red Maple versus some other tree. With a graft, a cutting from a known October Glory tree is inserted into stem of maple rootstock. After the graft is securely attached, the top of the rootstock tree is cut away, resulting in a slight kink in the stem that later forms a swelling at the joint between the two different plants, and is sometimes misidentified as the trunk flare.
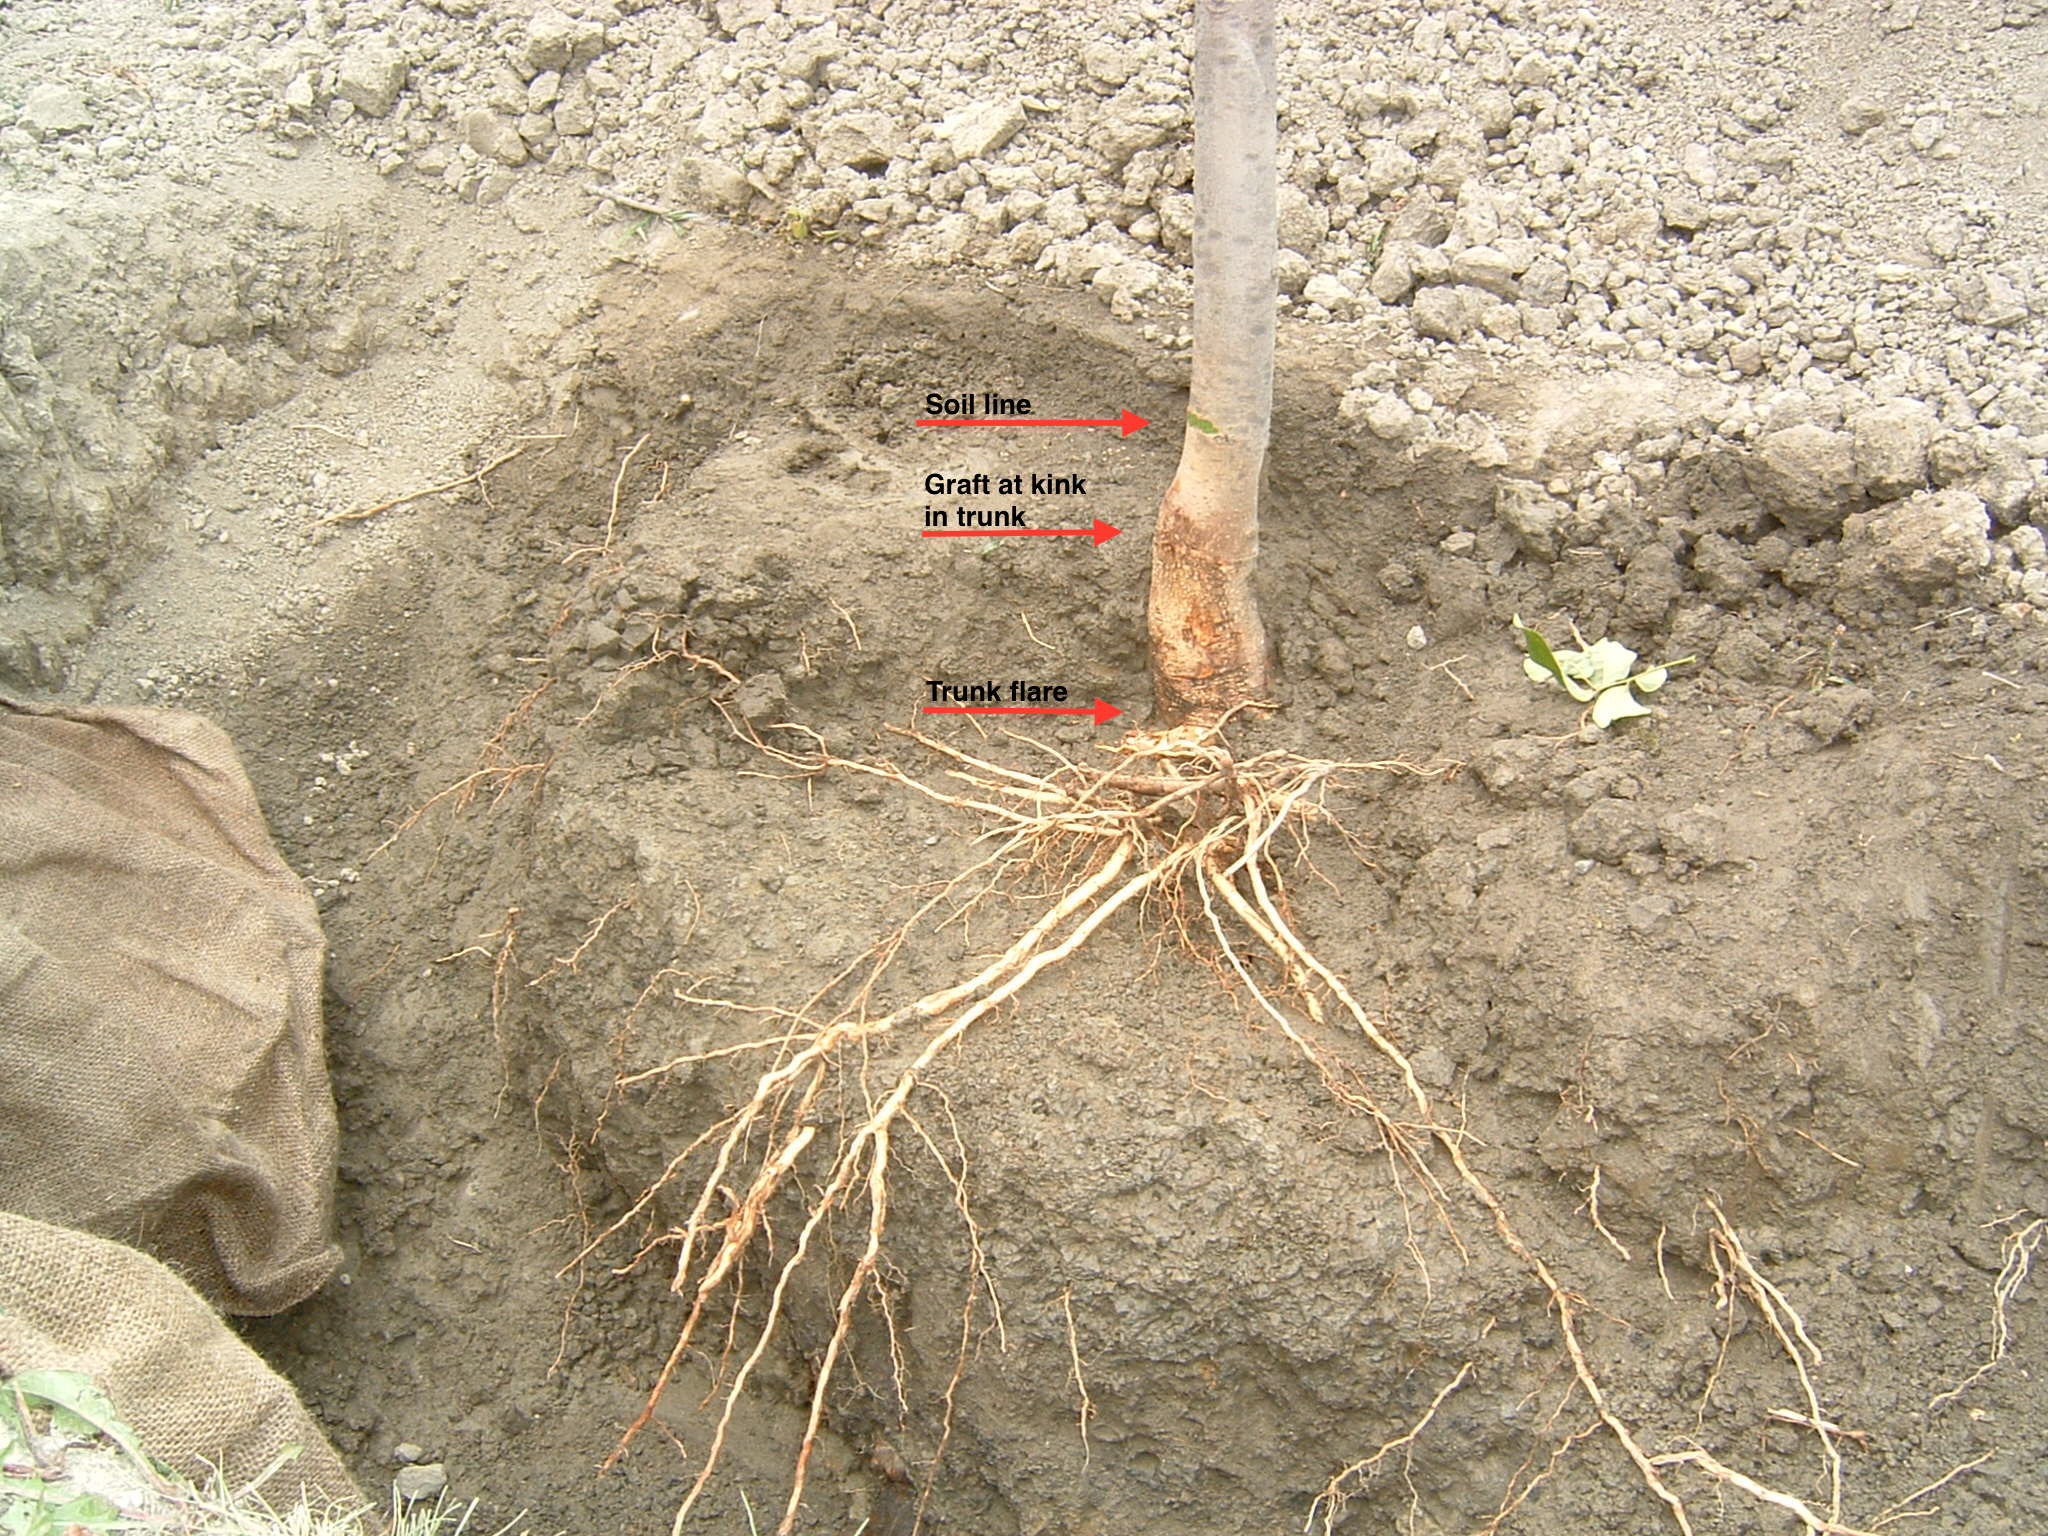
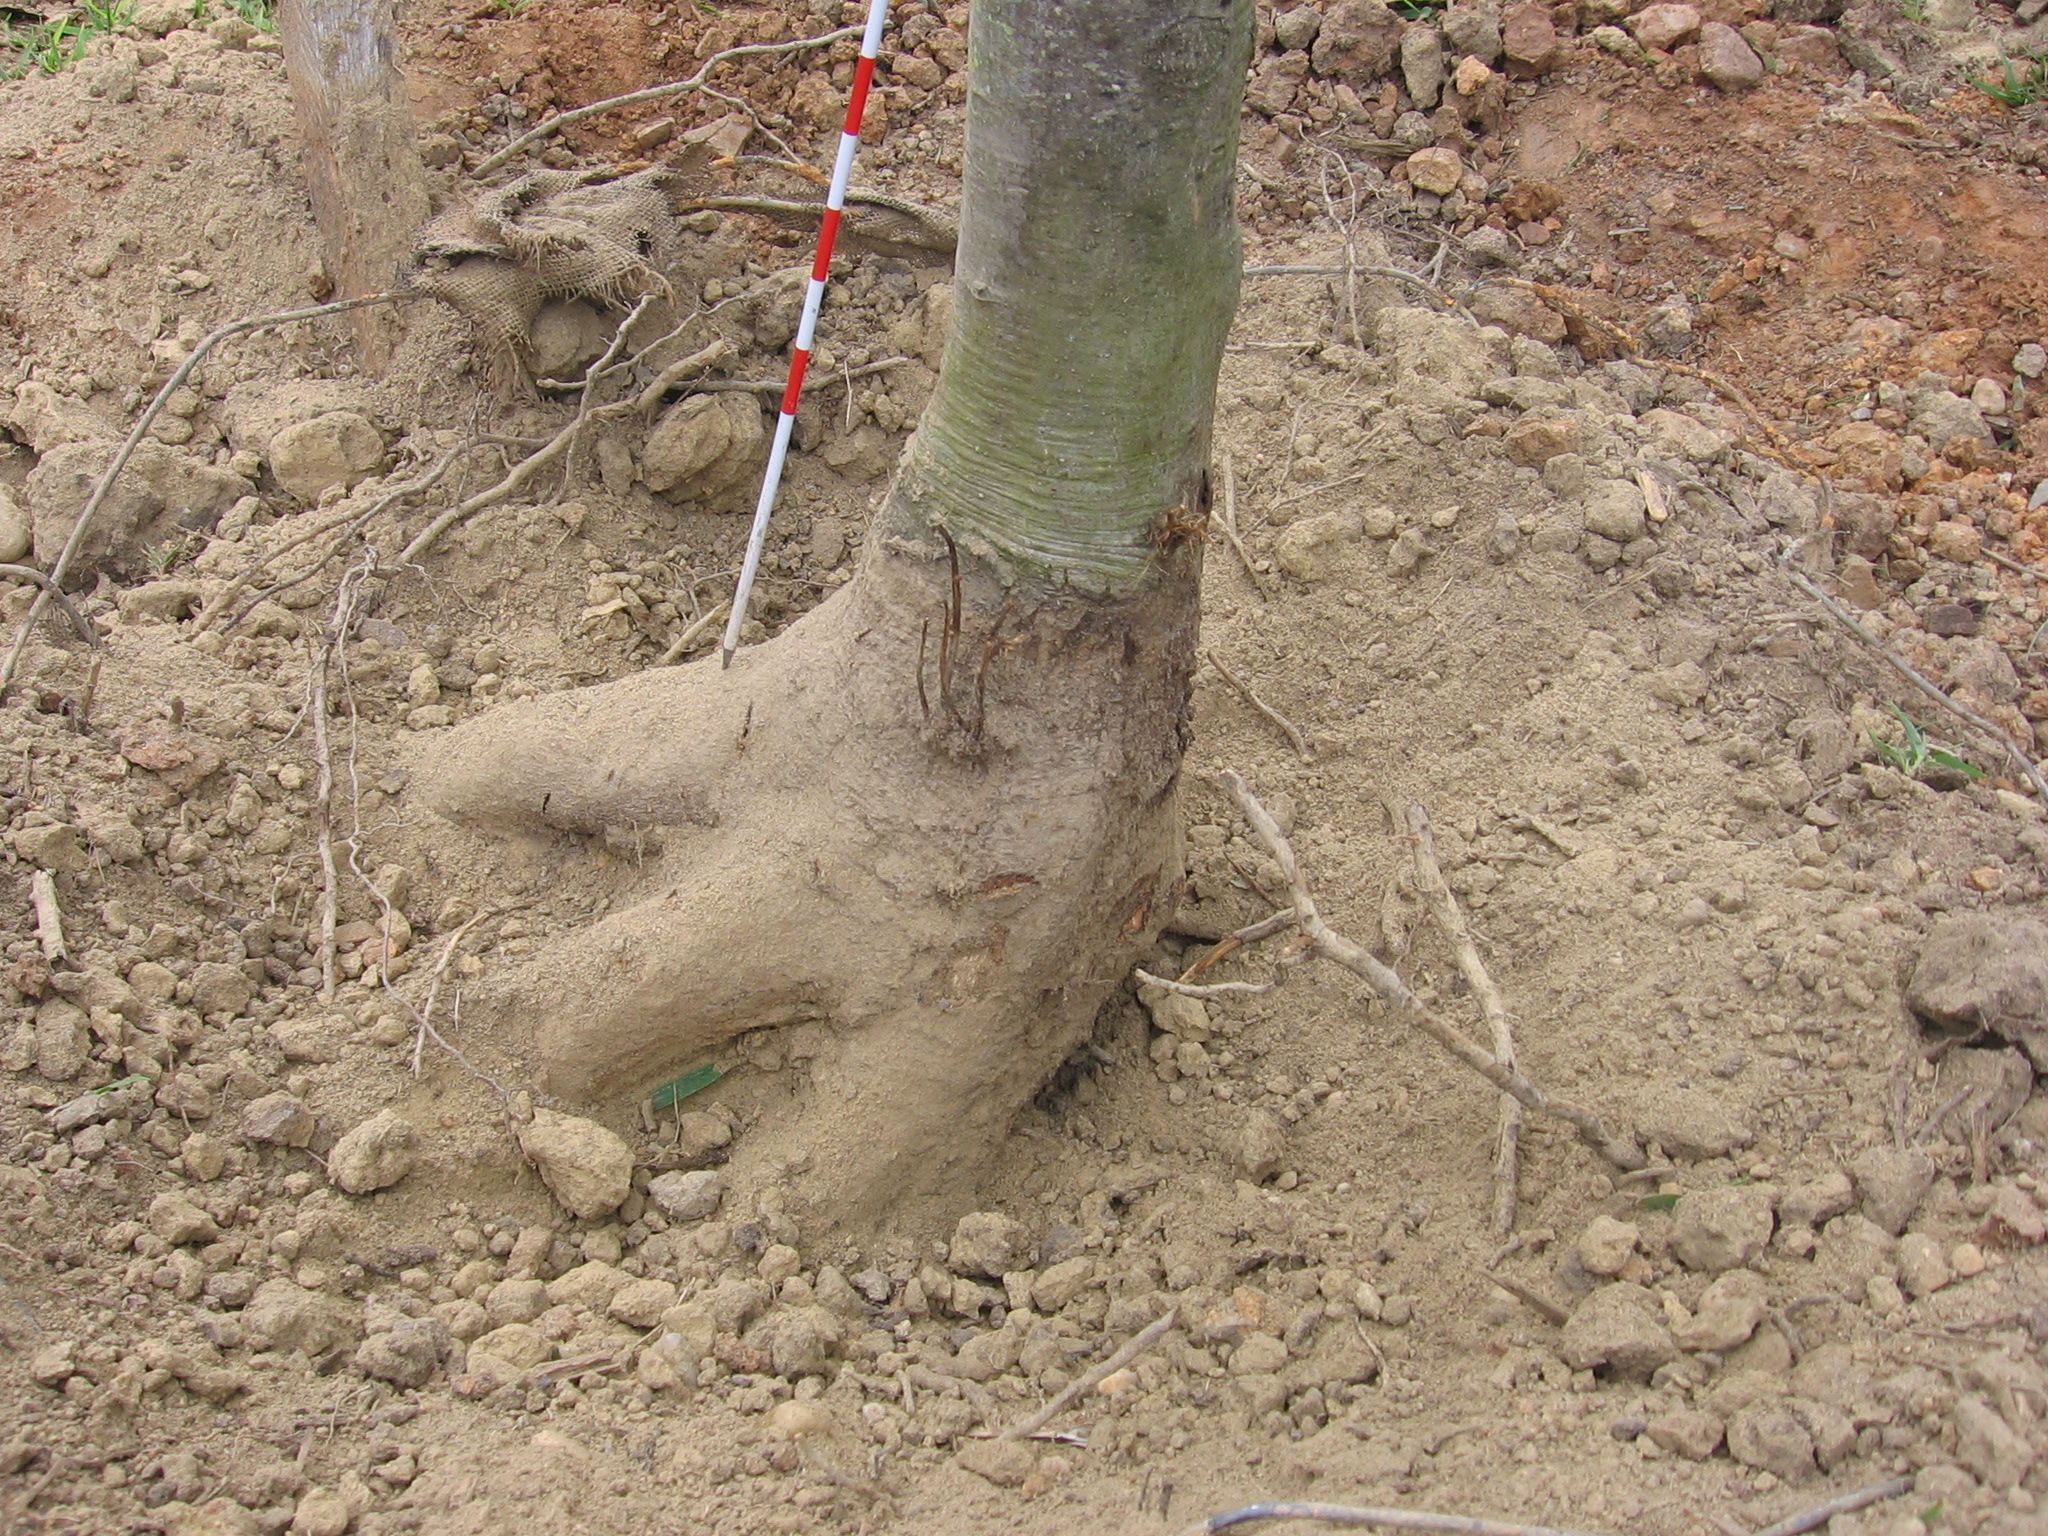
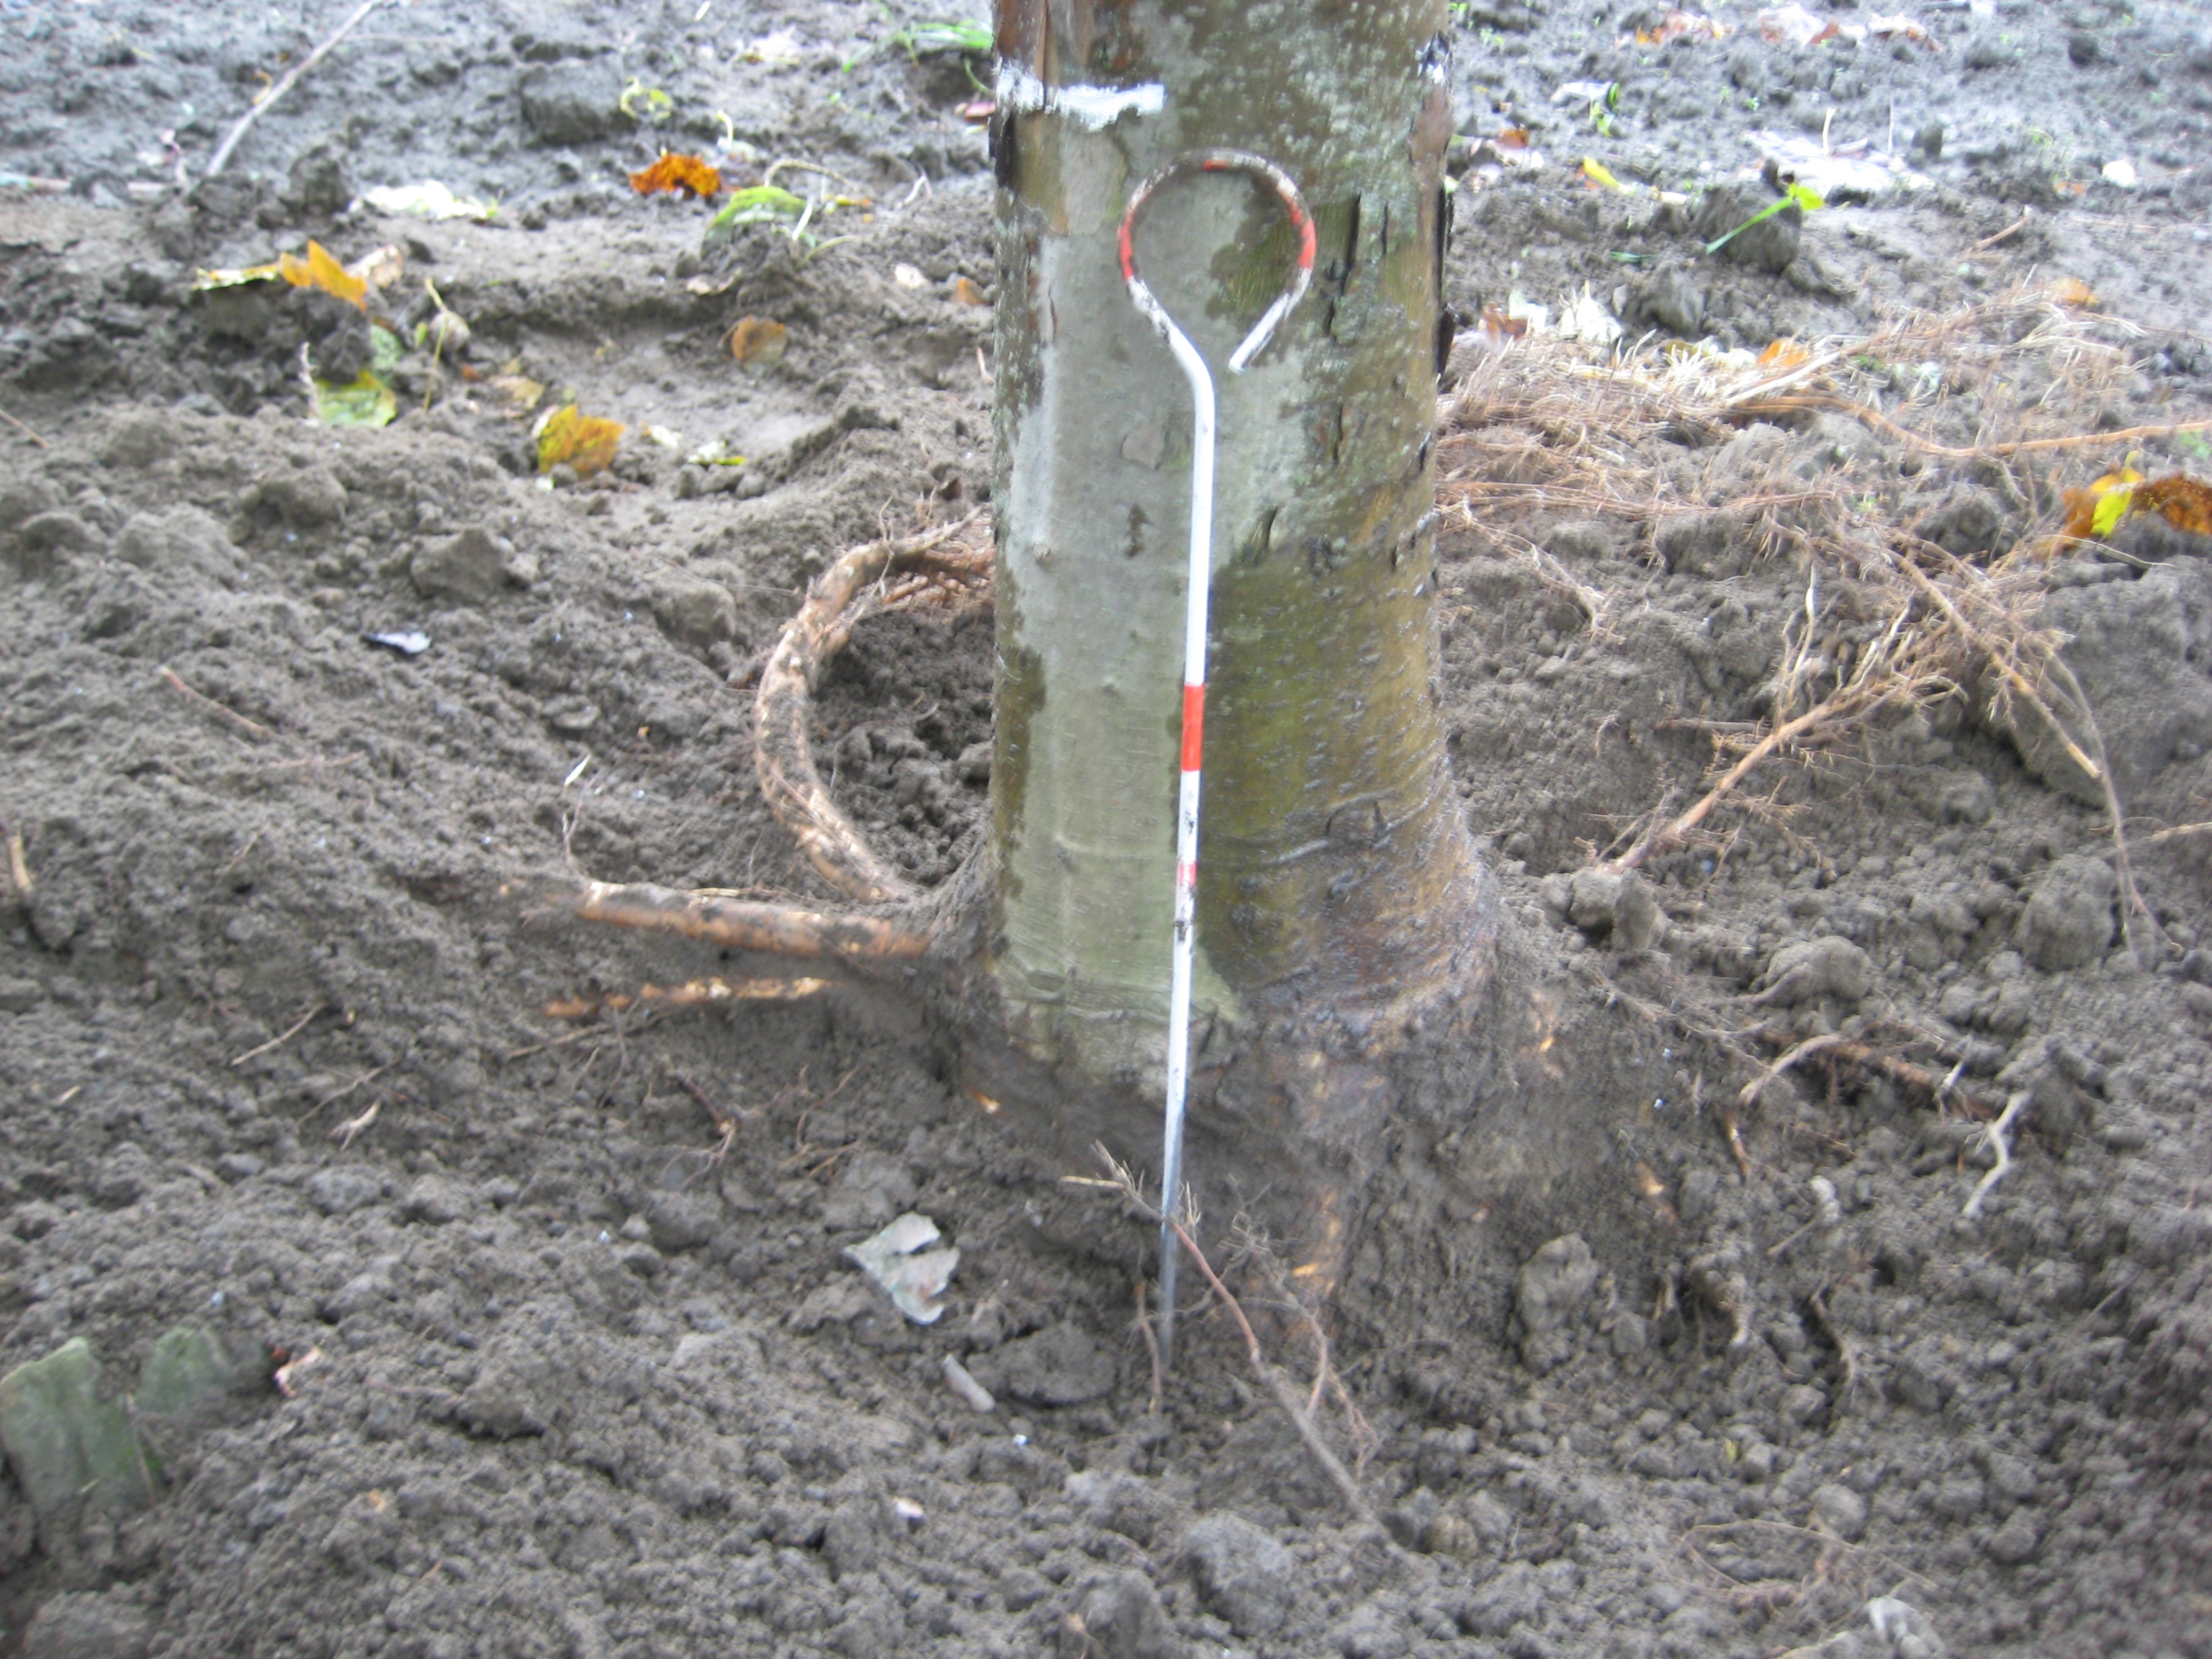
Buried trunk flare in nursery stock. Most of the soil above the flare should be removed before the tree is harvested. Note that there are no roots in the soil above the flare.
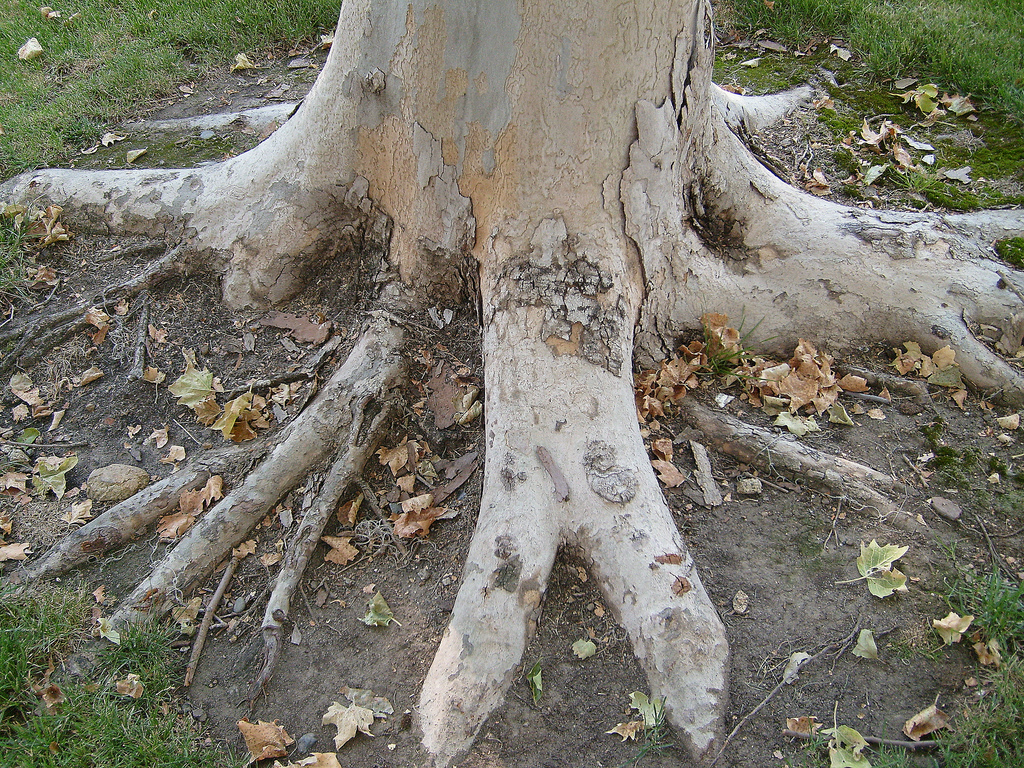
A true trunk flare is the point where the large buttress roots begin to grow out of the main trunk stem, becoming more horizontal. In all trees the bark of the roots is different than the trunk bark, usually smoother and often with pronounced ringed ridges circling the root. The transition zone is often a sharp division line. As the roots grow they should curve into a more horizontal alignment and be roughly 15 to 30% the diameter of the trunk.
In some production processes, adventitious roots may emerge at right angles to the trunk well above the main trunk flare. These roots are typically much smaller than the trunk diameter and are best removed. In some species and production methods several adventitious roots may be well above a lower collection of roots that might be the trunk flare. While not the best situation, these upper roots can develop into a good trunk flare. I would want to have at least three such roots and they should be a minimum of ¼ of the trunk diameter to even consider this.
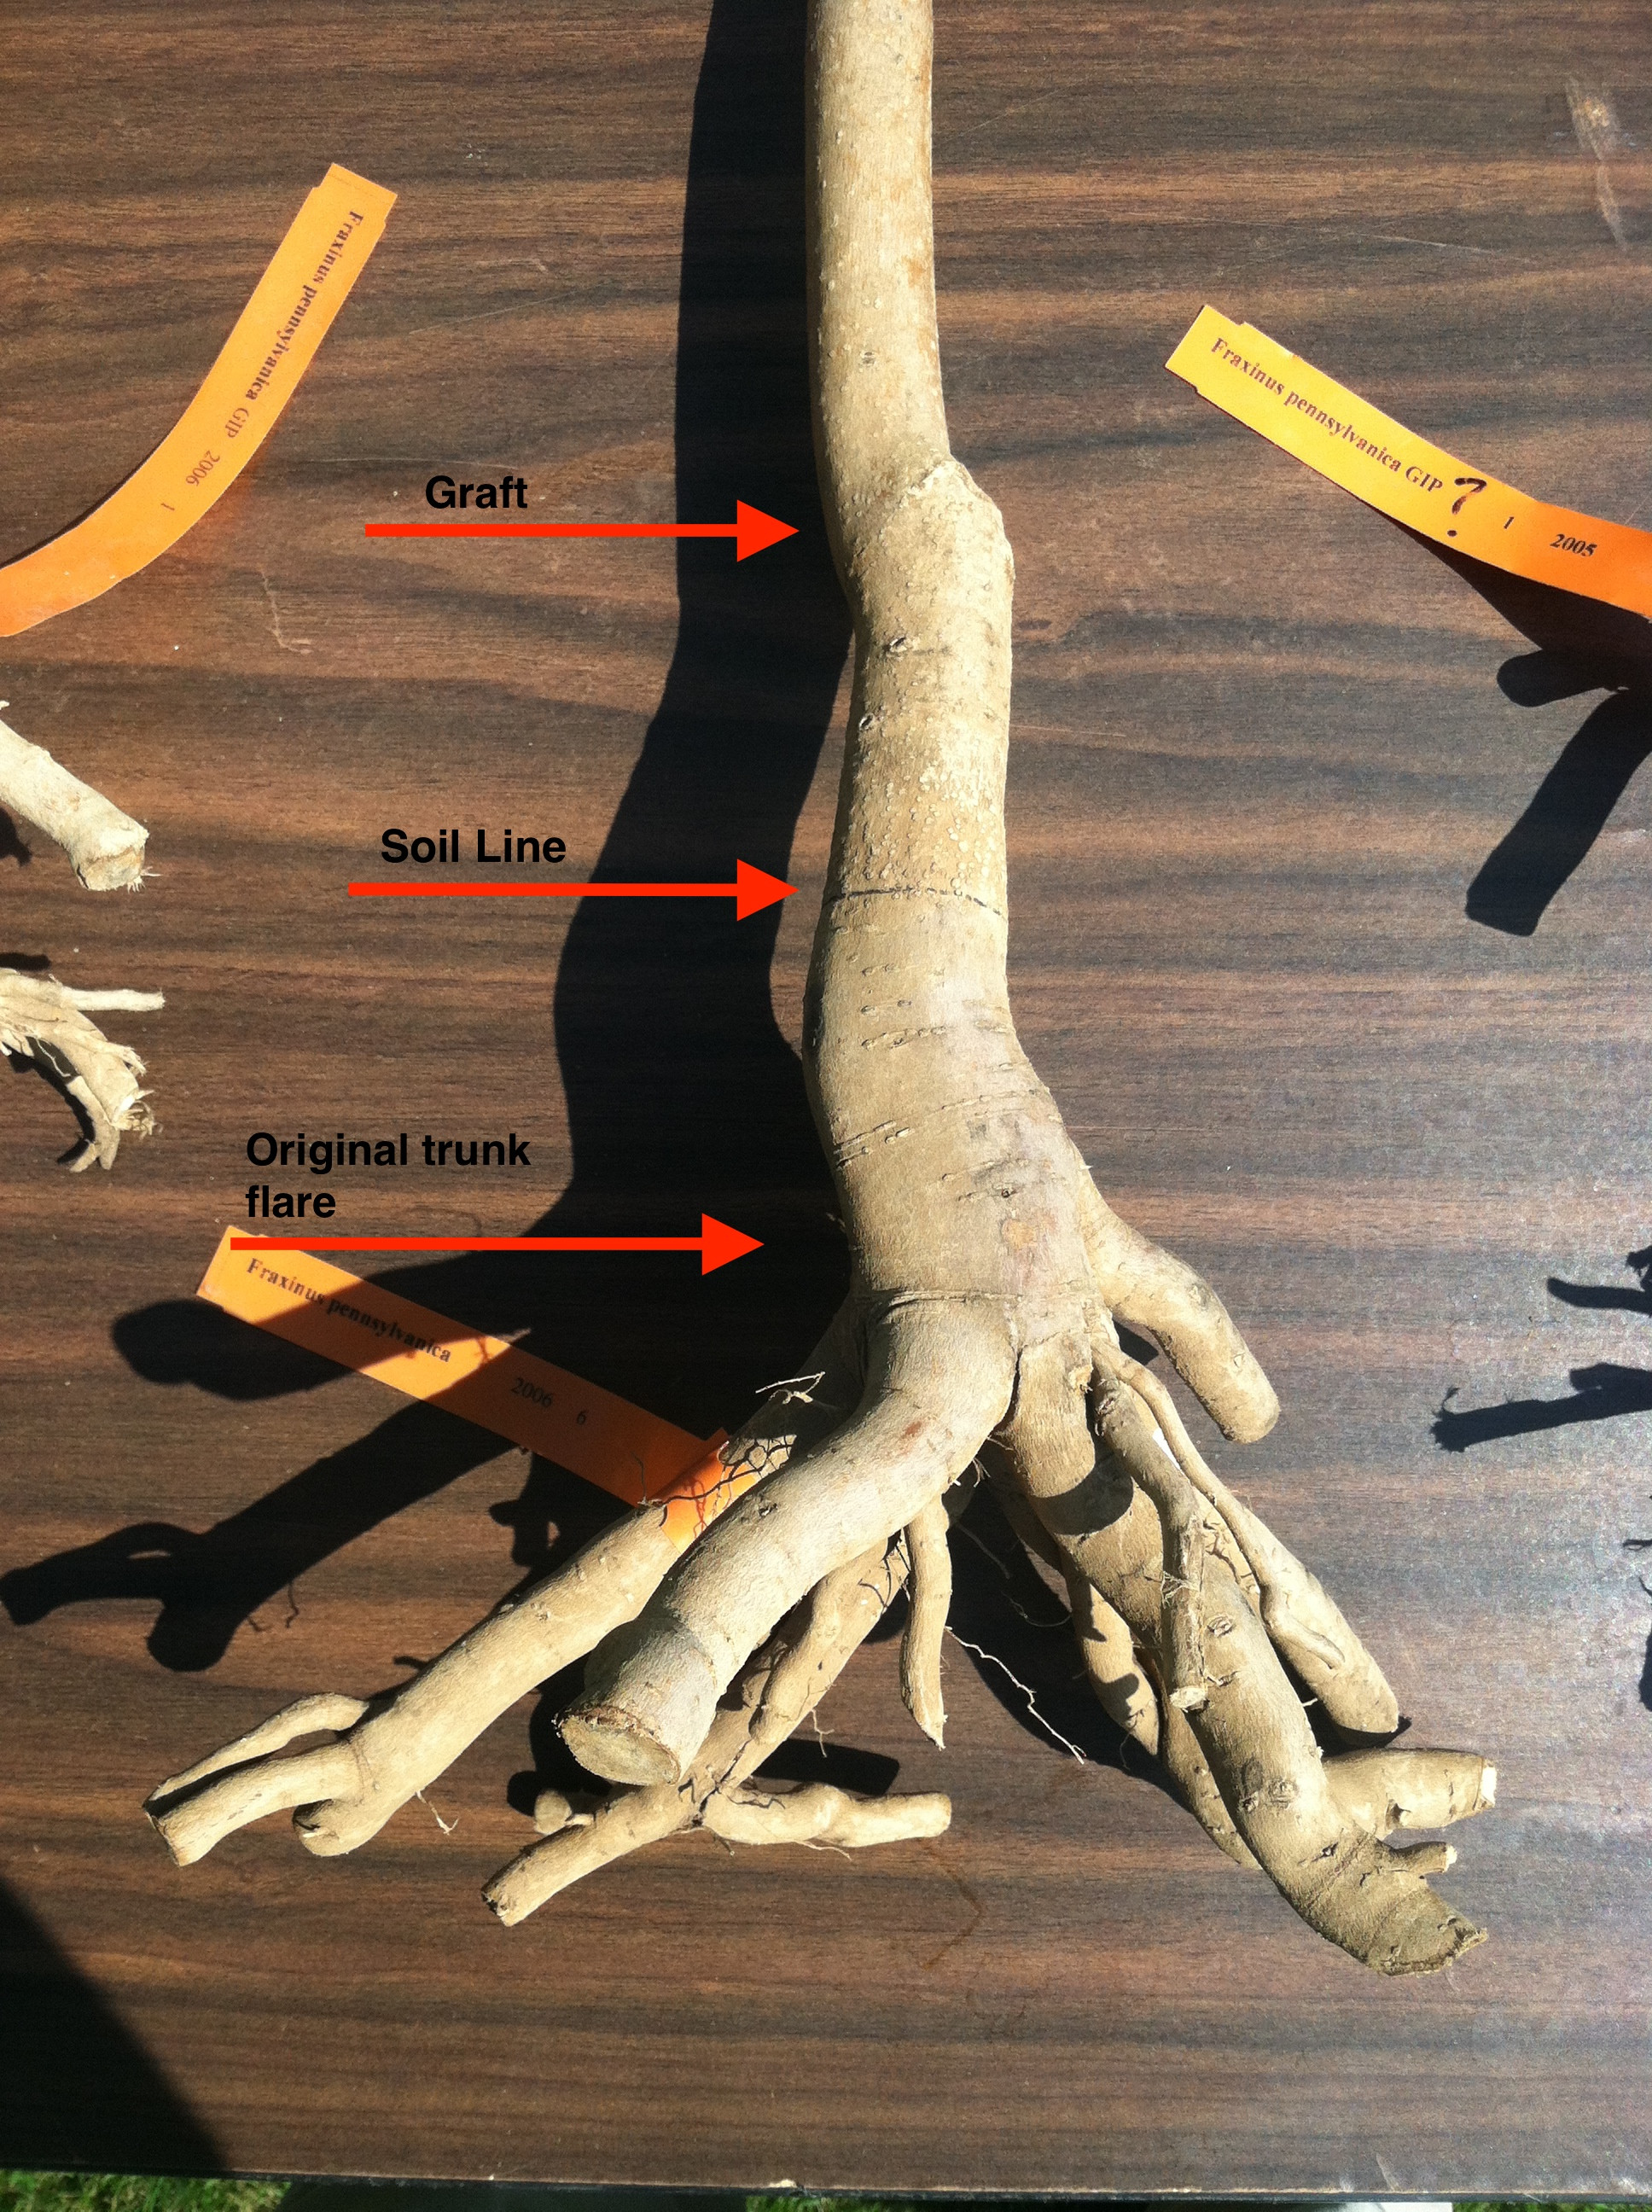
Tree in early production with the trunk flare at the original root division but with roots that descend rapidly.
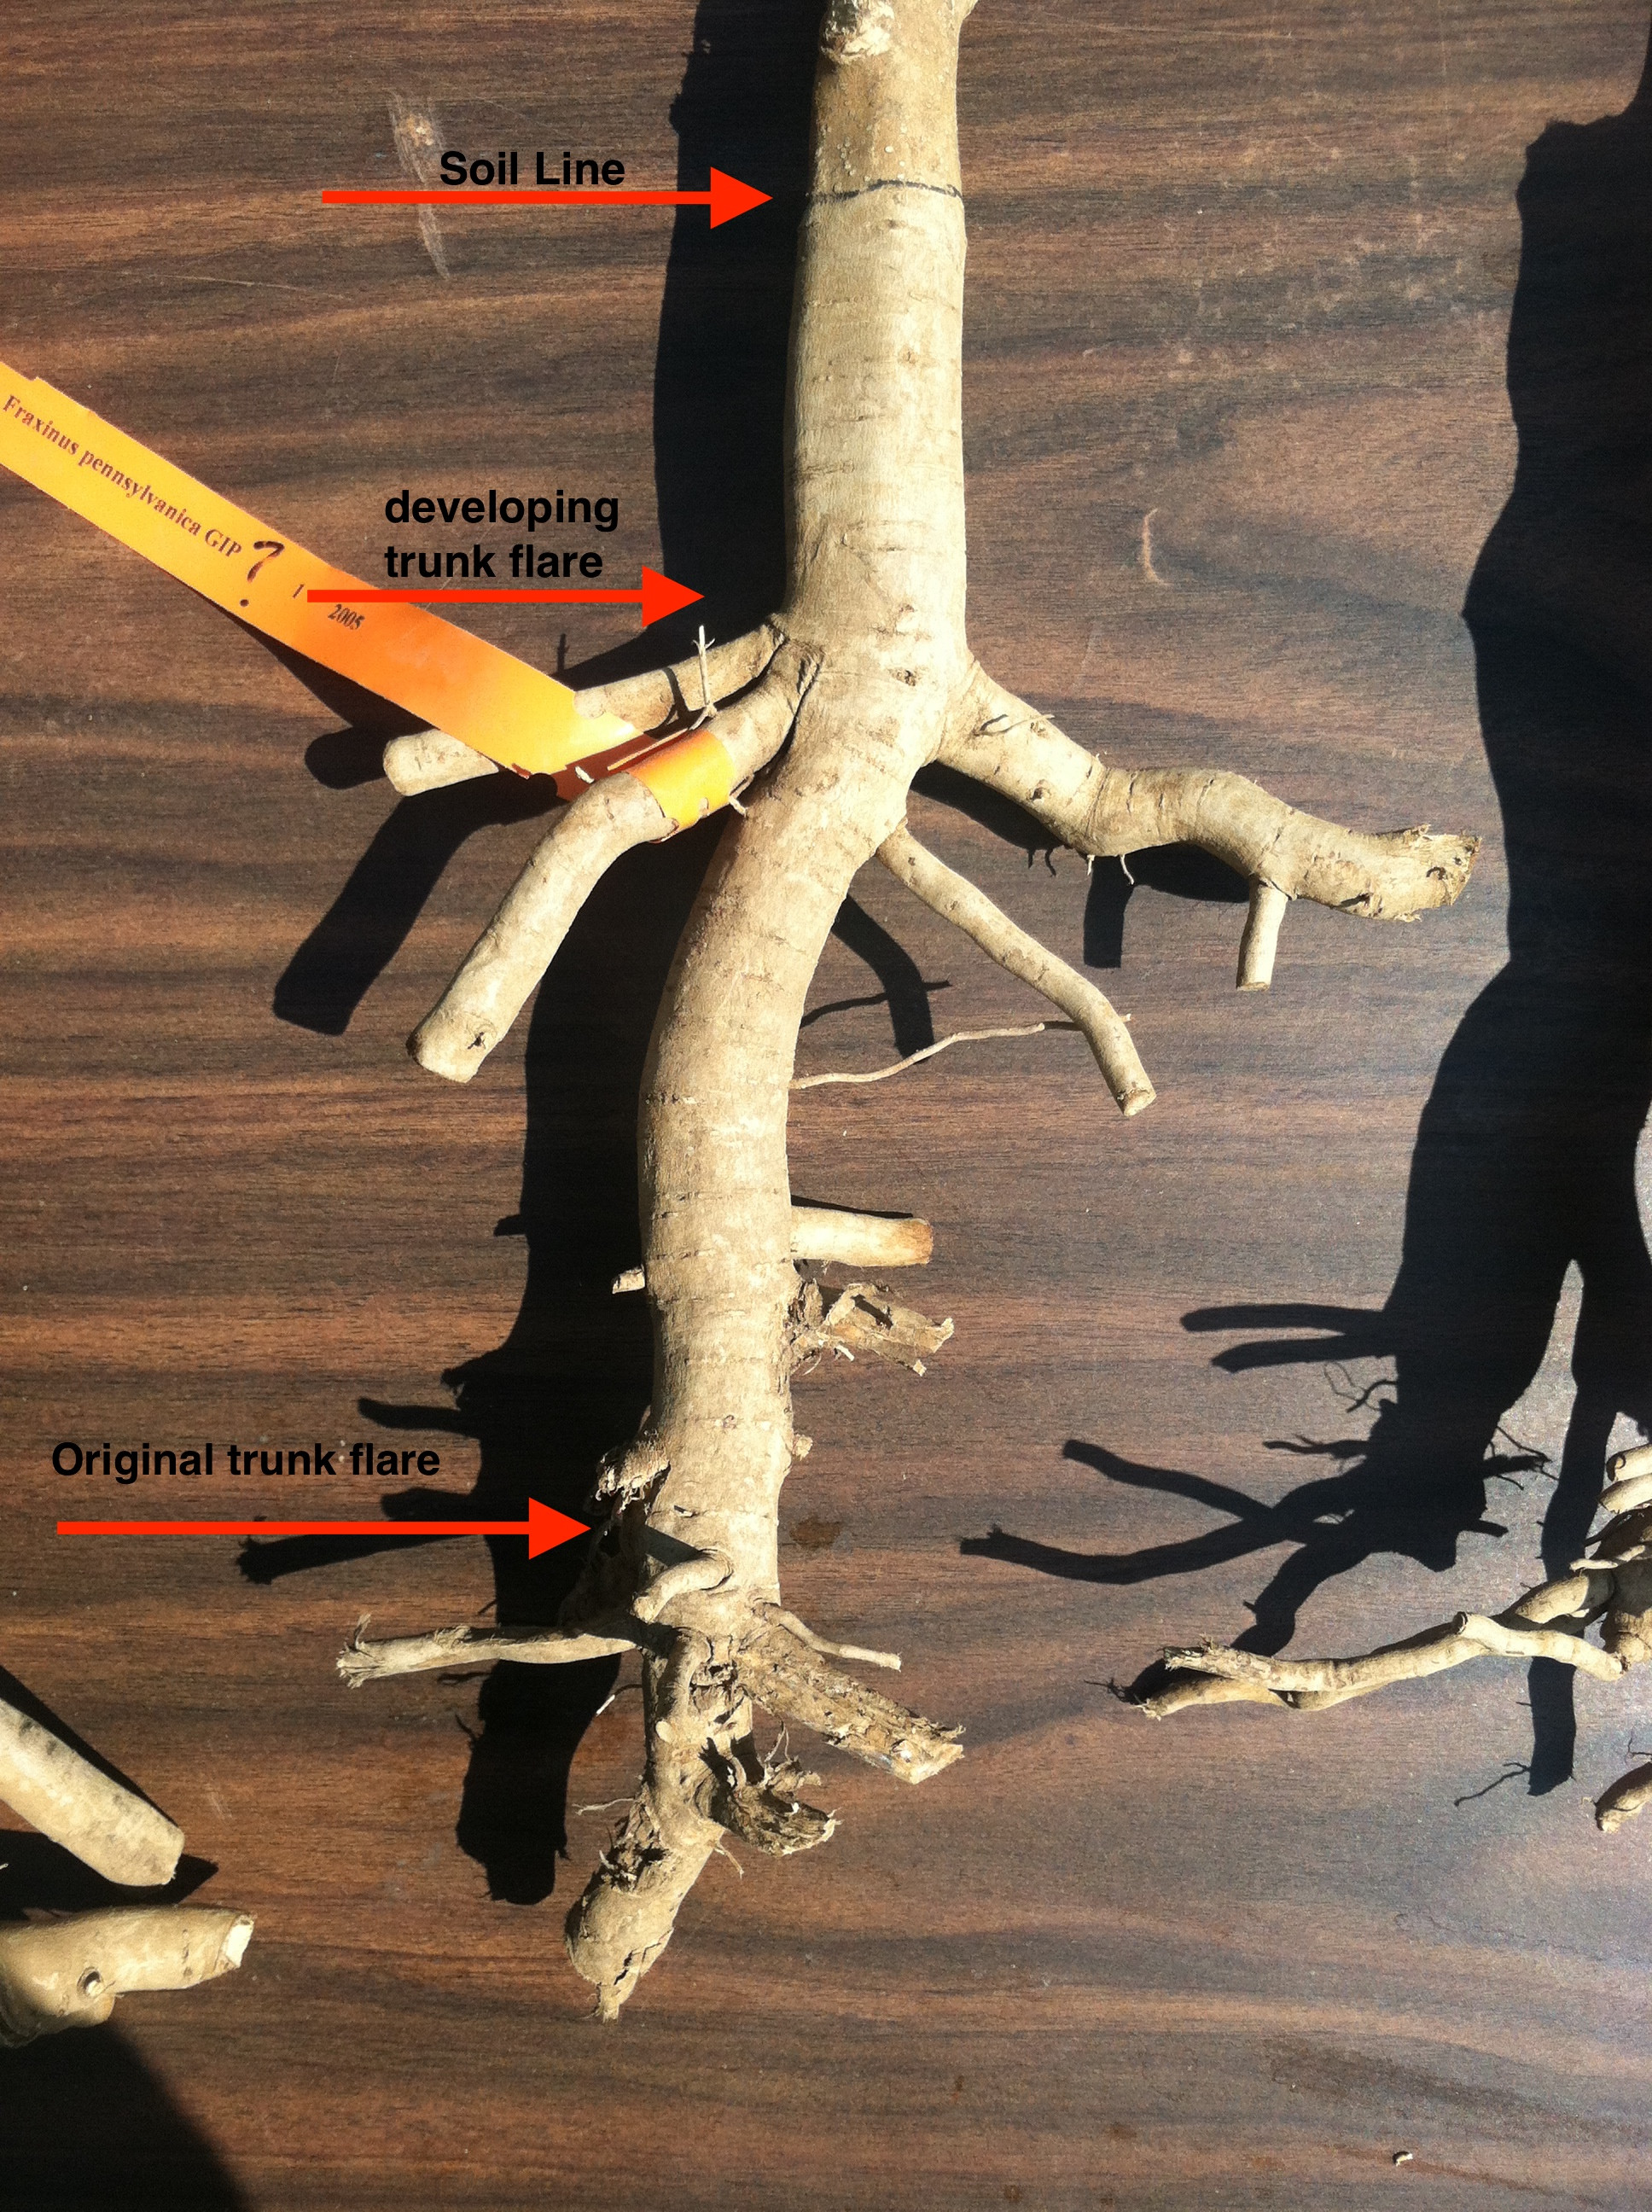
Tree in early production with a developing trunk flare above the original root division. The proper planting height is more than 3” above the developing trunk flare.
Unfortunately, at this time the nuances of the root architecture of different species and root response to different production methods is still being investigated. The inspector will have to rely on their experience as to when to accept, reject, or request modification of some of the root systems that will be encountered.
First impression assessment
Since the belowground inspection is time consuming, start with a quick overview of the above-ground conditions of the trees you are inspecting to see if there are a suitable number. Then do the sample testing of the belowground conditions on those trees before the final selections based on aboveground defects is observed.
It is impossible to inspect the roots for every tree to see if they meet the specification, and random sampling of the most critical elements is typically sufficient. Most growers will try and tell you that their trees meet the specifications, but only a few of the best growers are producing good root systems and these growers are typically happy to have you inspect. For the rest, this inspection will be a negotiation and is where advance discussion and education pays off.
Root packages
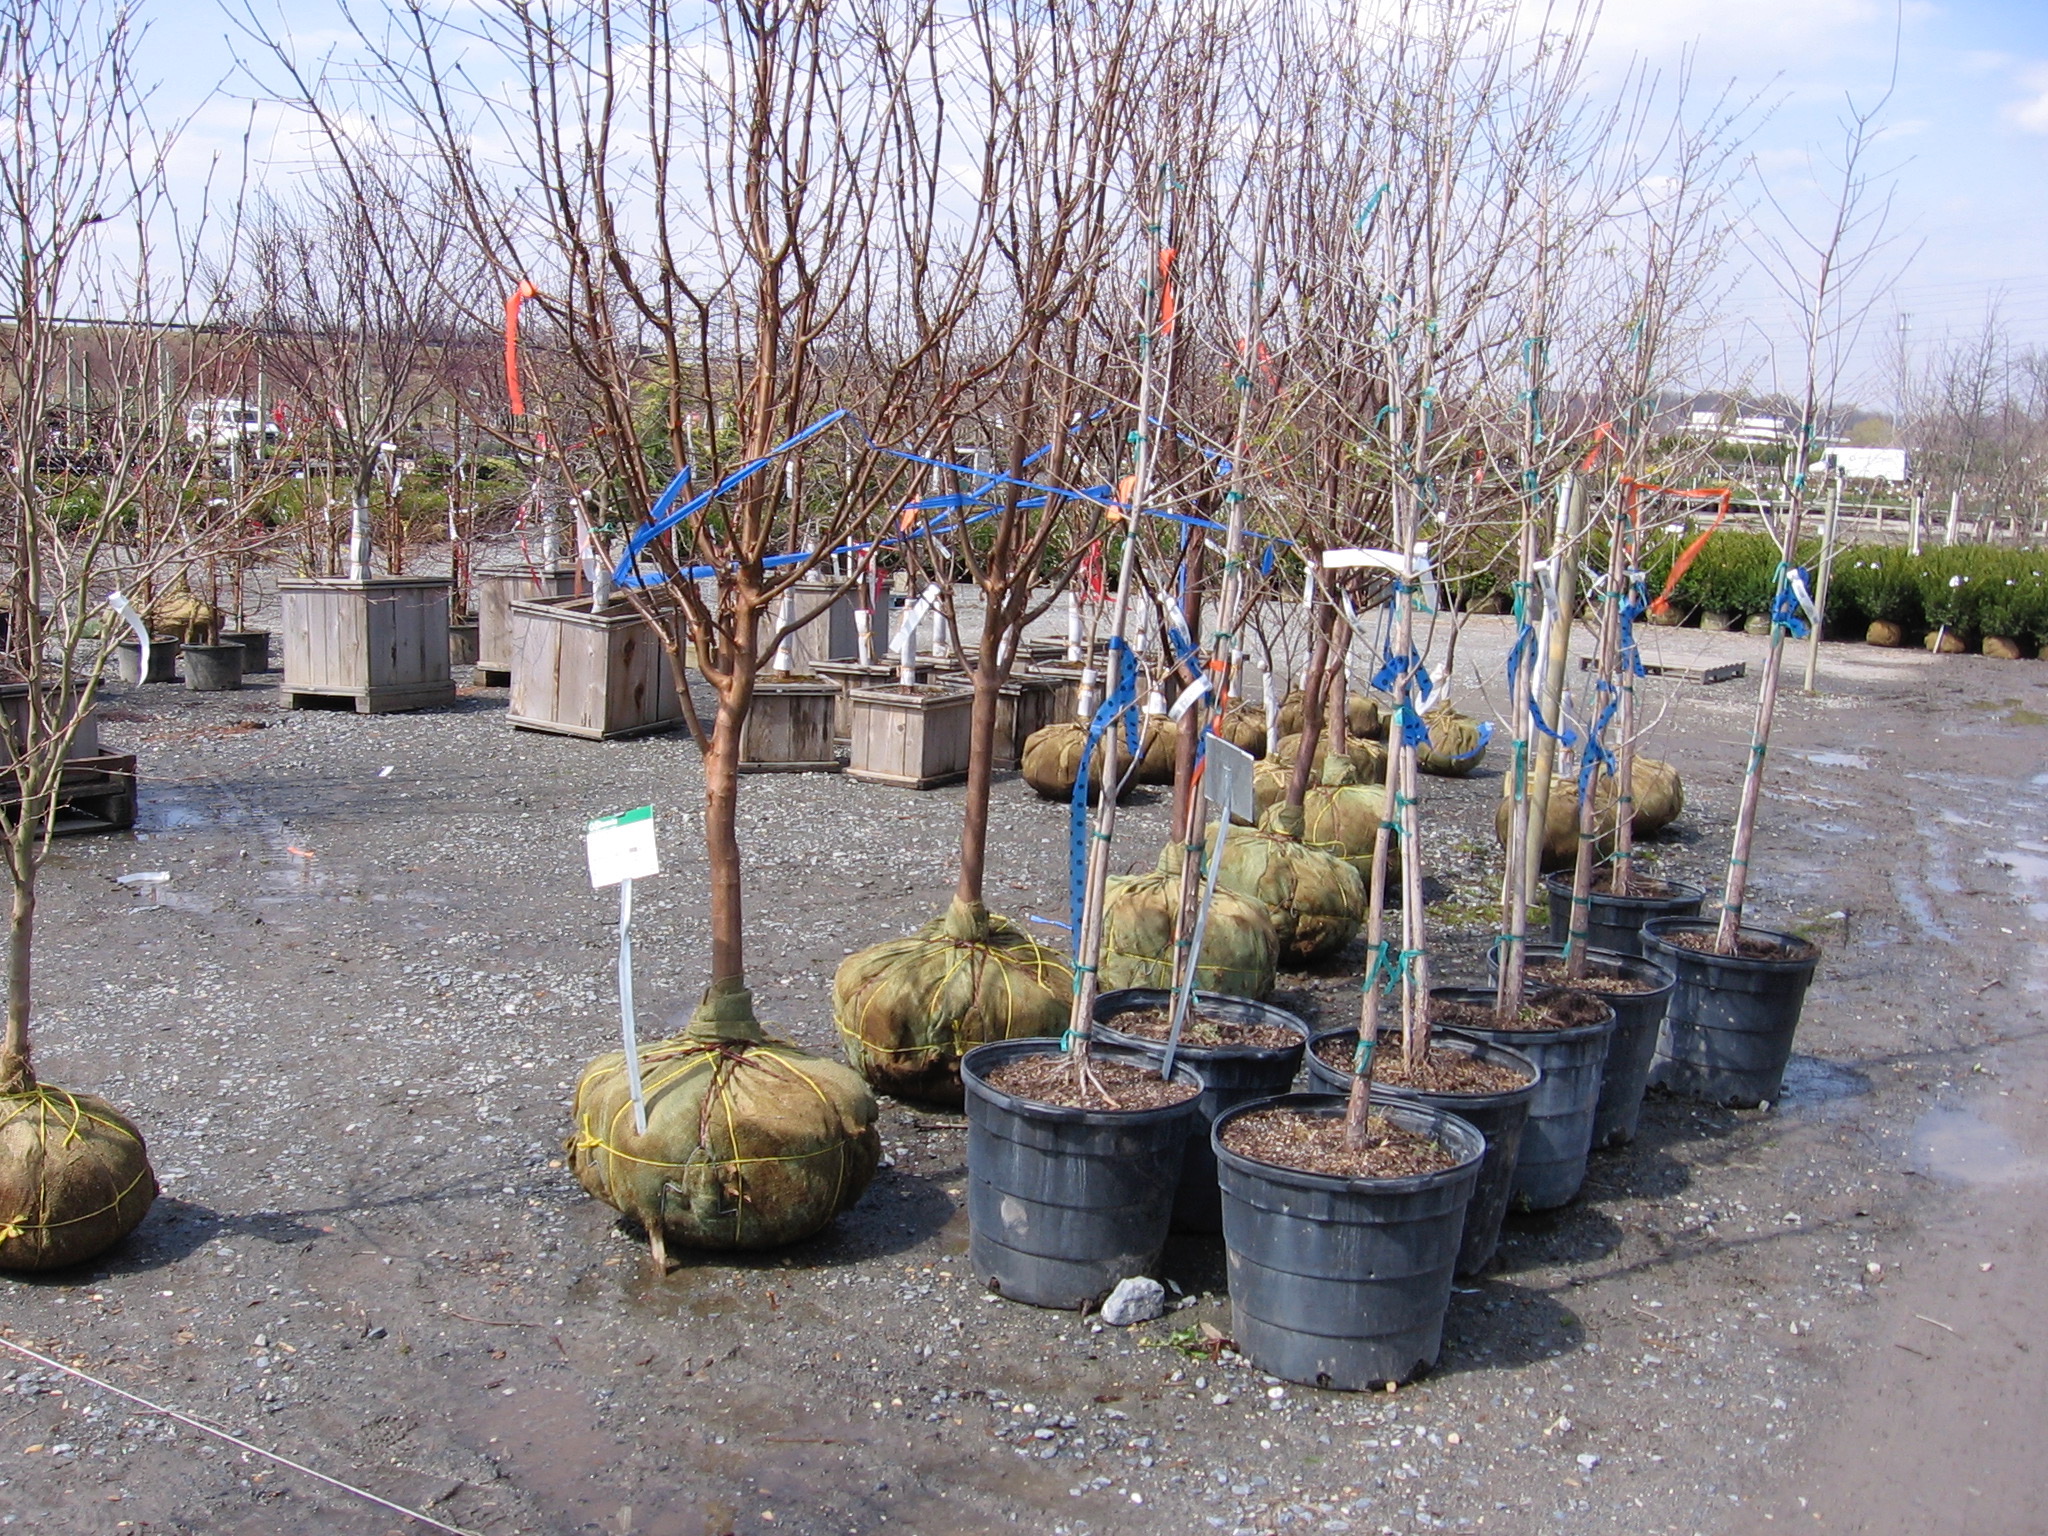
The nursery industry produces many different types of root packages, a term that refers to how the root ball is produced and prepared for shipping. Trees are supplied in balls and burlap, many types of containers, boxes, fabric bags, and bare root. Each package has its own set of inspection requirements and methods. A tree may also be subjected to several different package systems as it passes through the production pipeline. Most trees, even some B&B trees, will at some point be grown in a container, which imprints its shape on the root system and is where most root defects originate.
In addition, each tree may also have been the product of several different growers. Few nurseries produce a tree from scratch. Tree propagation is a specialty process, the domain of a small number of growers for each species. Small plants may then be purchased by liner producers who grow a broad number of species to a size where field nurseries then purchase them to grow into marketable size. Ask questions of the grower, such where the liner stock came from and if it was purchased as a container tree or bare root. Any tree that was ever in a container is suspect and requires extra effort to find potential defects.
Balled and burlapped (B&B) trees
Randomly select three trees in the block to inspect the root collar. Make a careful inspection of the base of the tree looking for the trunk flare and/or graft swelling. Using a sharpie, mark the soil line on the tree and start carefully digging around the base of the tree with the trowel and hand cultivator. The surveyor chain pin can help confirm root locations without as much digging, but all three tools will be useful.
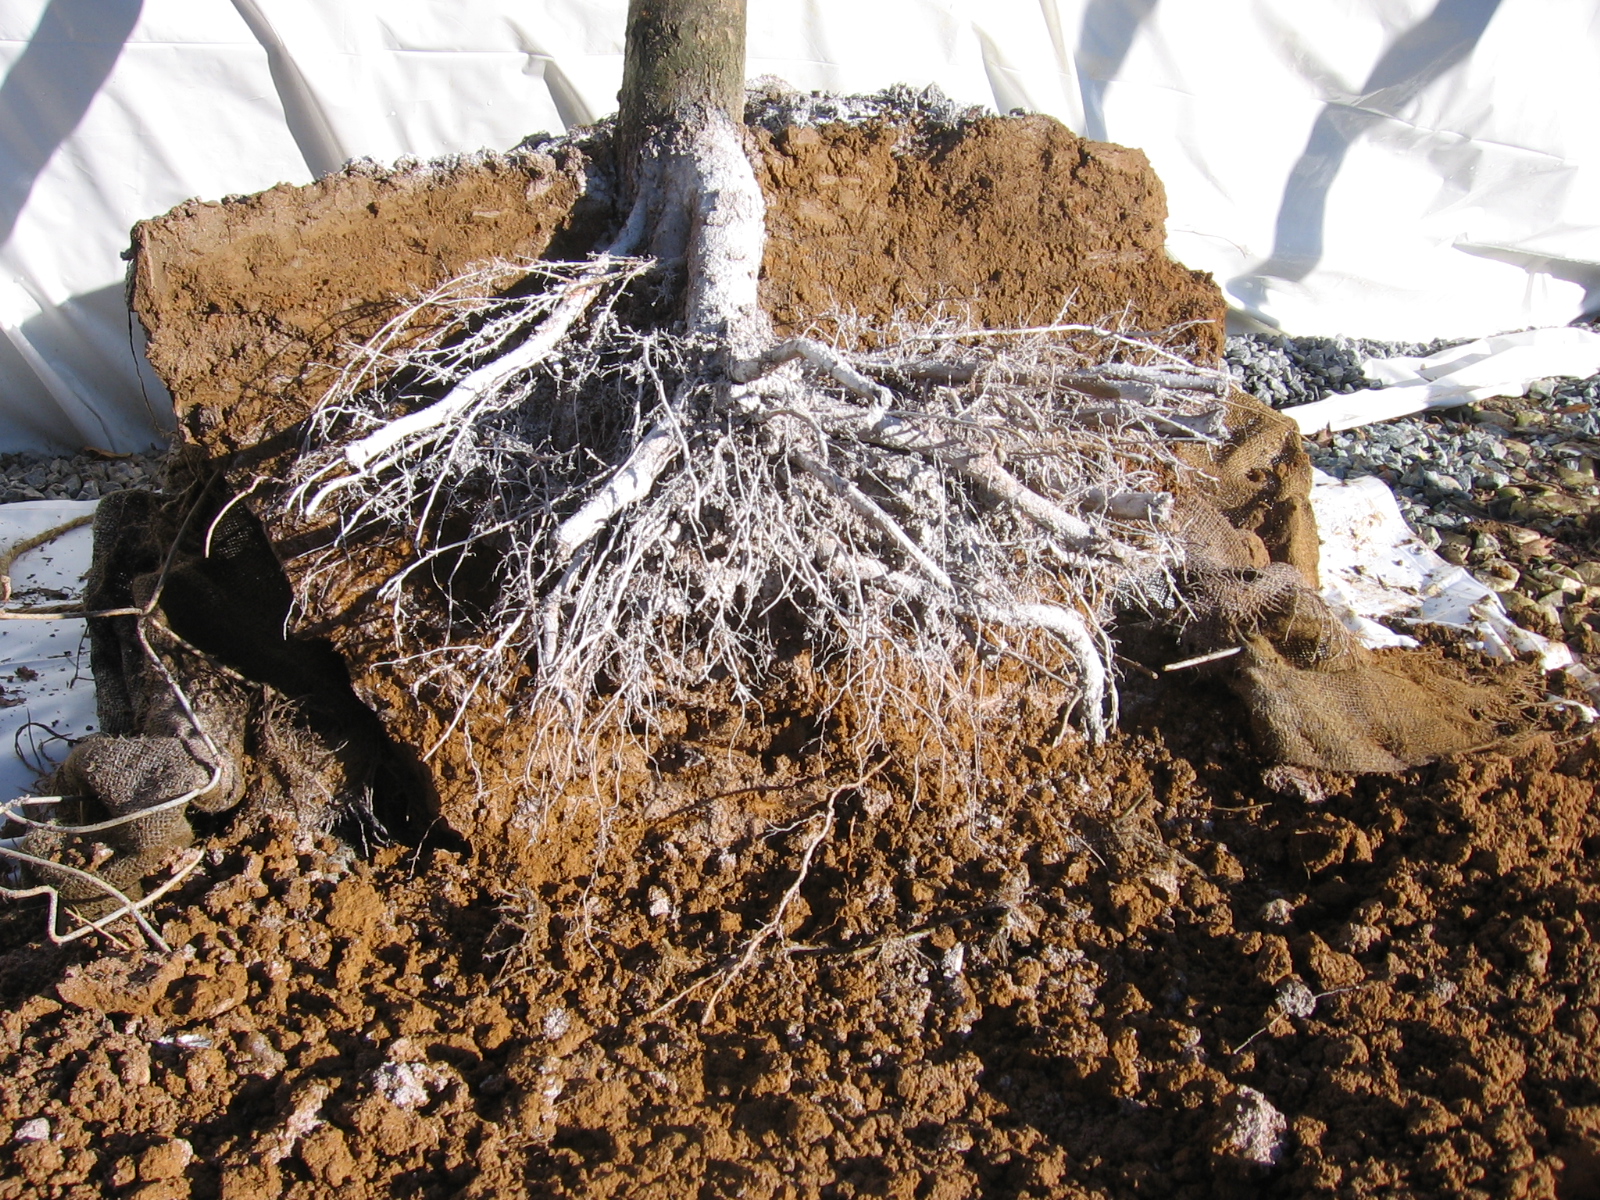
Partially excavated B&B rootball showing large section of soil above the root system. Most of the soil should be removed before harvesting. If not, it should be removed before planting.
Keep digging until you find the trunk flare. The deepest trunk flare I have observed was almost 12 inches (30.5 cm) below grade, and that was at a grower known for supplying quality trees. 6 to 8 inches (15 to 20 cm) below grade is not uncommon. Note any roots that are circling around the trunk and any adventitious roots emerging out of the trunk above the trunk flare. Look for evidence of the root imprint of a previous container used during the propagation process. This is often indicated by a change in soil color from the field soil color to a darker brown composted bark material. If this is encountered, look for girdling and kinked roots.
Look for ‘T’ and ‘J’ rooted trees where the buttress roots run in opposite directions (T roots) or in just one direction (J roots), following the planting line of the trees. ‘T’ rooted trees may be acceptable depending on the extent of the root malfunction and may require an oversized root ball. ‘J’ roots should always be rejected. Typically, if one tree in a row has either of these root defects most of the trees will be similar.
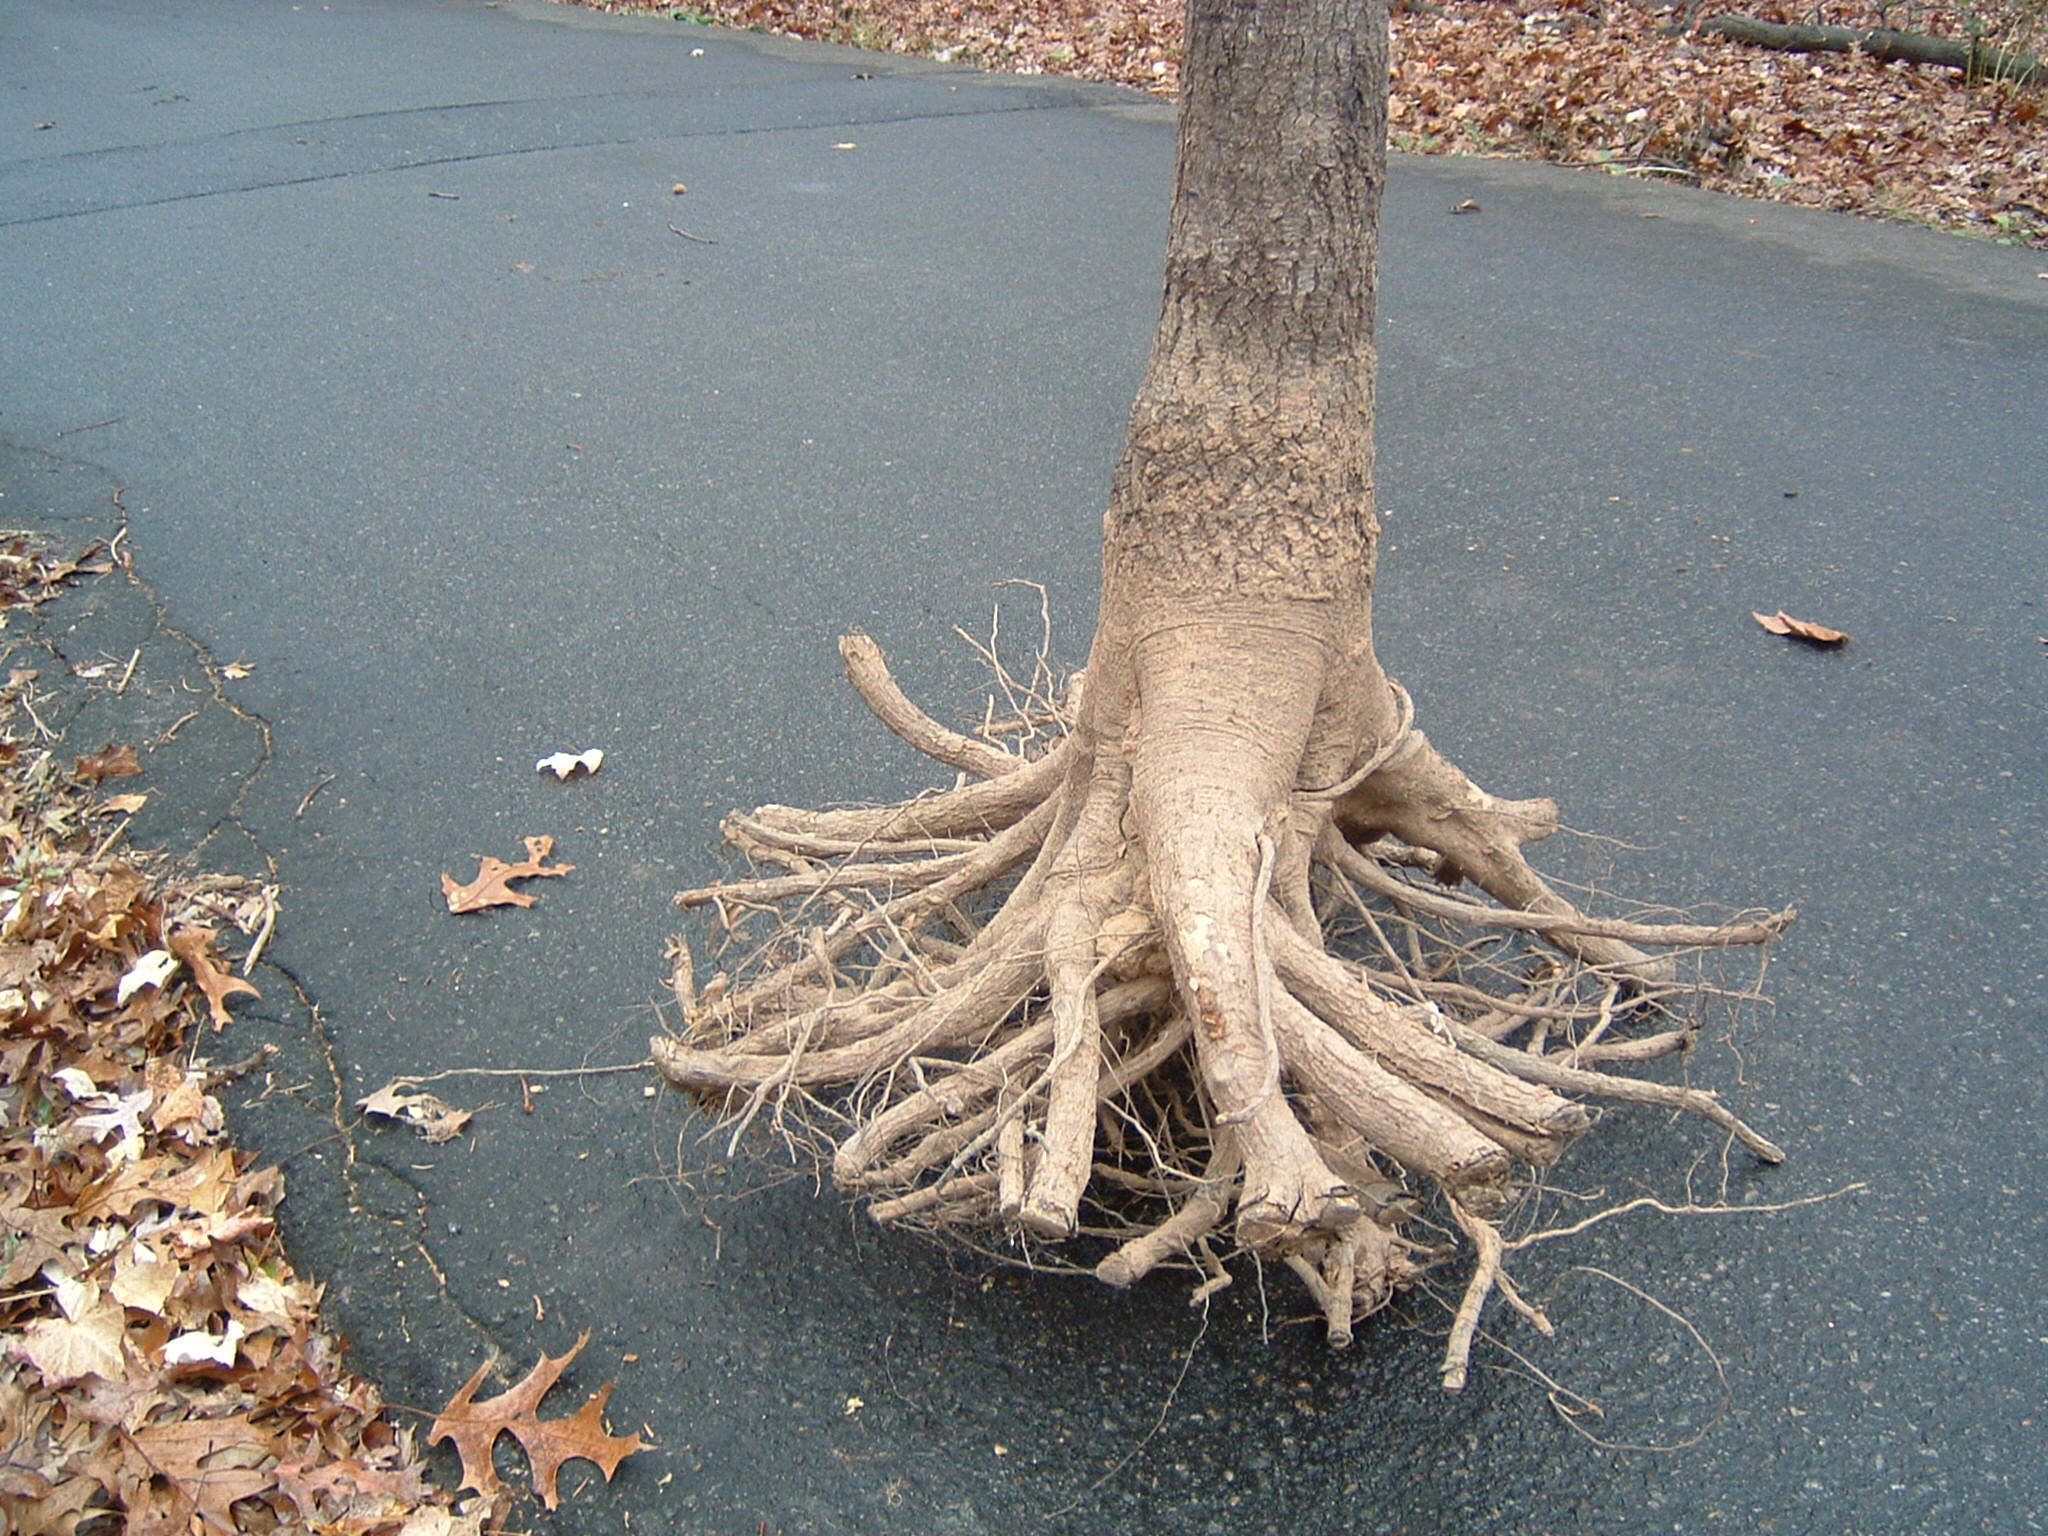
‘T’ rooted tree with the main buttress roots only in two directions. This tree’s root system is also too deep in the ground.
As you dig, note the elevation of the trunk flare. This is the point where the bark texture changes and on most trees is a sharp, sudden transition. Measure up from the trunk flare line 12 inches (30.5 cm) and make a mark on the trunk with the grease pencil or lumber crayon in a color that contrasts with the bark color. Measure down from this upper mark to the mark of the soil line. Call the distance from the upper mark to the soil line dimension ‘A’. After three trees are investigated, calculate the average of all three ‘A’ dimensions. Then start the above ground inspections. For each tree determined to be acceptable, measure up from the ground the average ‘A’ dimension and make a contrasting mark on the bark.
The trunk flare after the removal of any required soil should be at an elevation that sets the top of the main roots no more than 3 inches (7.6 cm) below the ground measured 4 inches (10 cm) off the face of the tree. This is the standard in the American Standard for Nursery Stock, ANSI Z 60. Trees started in a container may have roots that grow down sharply, making it impossible to meet the above standard.
It may be that for the trees type you have specified, few trees are available without this defect. You may then have to make a choice between approving a defective set of trees or changing the design to find trees with acceptable root systems. For trees that are accepted with sharply descending roots, at a minimum you should remove any girdling roots to a depth of about 6 to 8 inches (15 to 20 cm) below the trunk flare that are above the tops of the main descending roots. There is not accepted science yet on the remediation of this last defect, so use your best judgment.
The grower should be instructed in writing to excavate the top of the root ball to a depth of 12 inches (30.5cm) below this upper mark before they begin to dig the root ball. During this excavation, any roots above the main roots should be removed. The results of the inspections and all required modifications must be documented in the submittal acceptance letter.
Container grown trees
A sizable portion of the trees produced in the United States are in plastic containers. These may be simple cylinders or a variety of shapes and perforations that are supposed to produce better root systems. Air pruning containers are considered an improvement, but most air pruning containers can still produce girdling roots – for example if it was previously in a smaller container that was not air pruning then internal girdling roots may still be a problem. ALL container designs are still subject to having the trunk flare buried, and many container trees have a mat of fibrous roots that can be up to 6 inches (15 cm) thick on top of the trunk flare. This root mat should be removed.
Each of the above issues must be observed in a similar manner to the root ball excavation described in the balled and burlapped inspection above. Each tree is marked with a point 12 inches (30.5 cm) above the trunk flare elevation within the container based on the three test trees However, digging through the root mat at the top of a container tree to find the trunk flare is much more difficult and time consuming. Girdling roots are typically greater in number and can be found throughout the container medium. Since most container trees have significant root defects, it may be best to simply bare root the root package immediately before planting or avoid using container trees altogether.
Fabric bag grown trees
These trees are likely to have fewer girdling roots on the perimeter of the fabric, but again if they were grown in a container earlier in the production process, there may still be girdling roots inside the root ball. The imprint of the previous container and buried trunk flare must also be investigated. Inspection and remediation of the root ball is similar to the techniques mentioned above.
Bare root trees
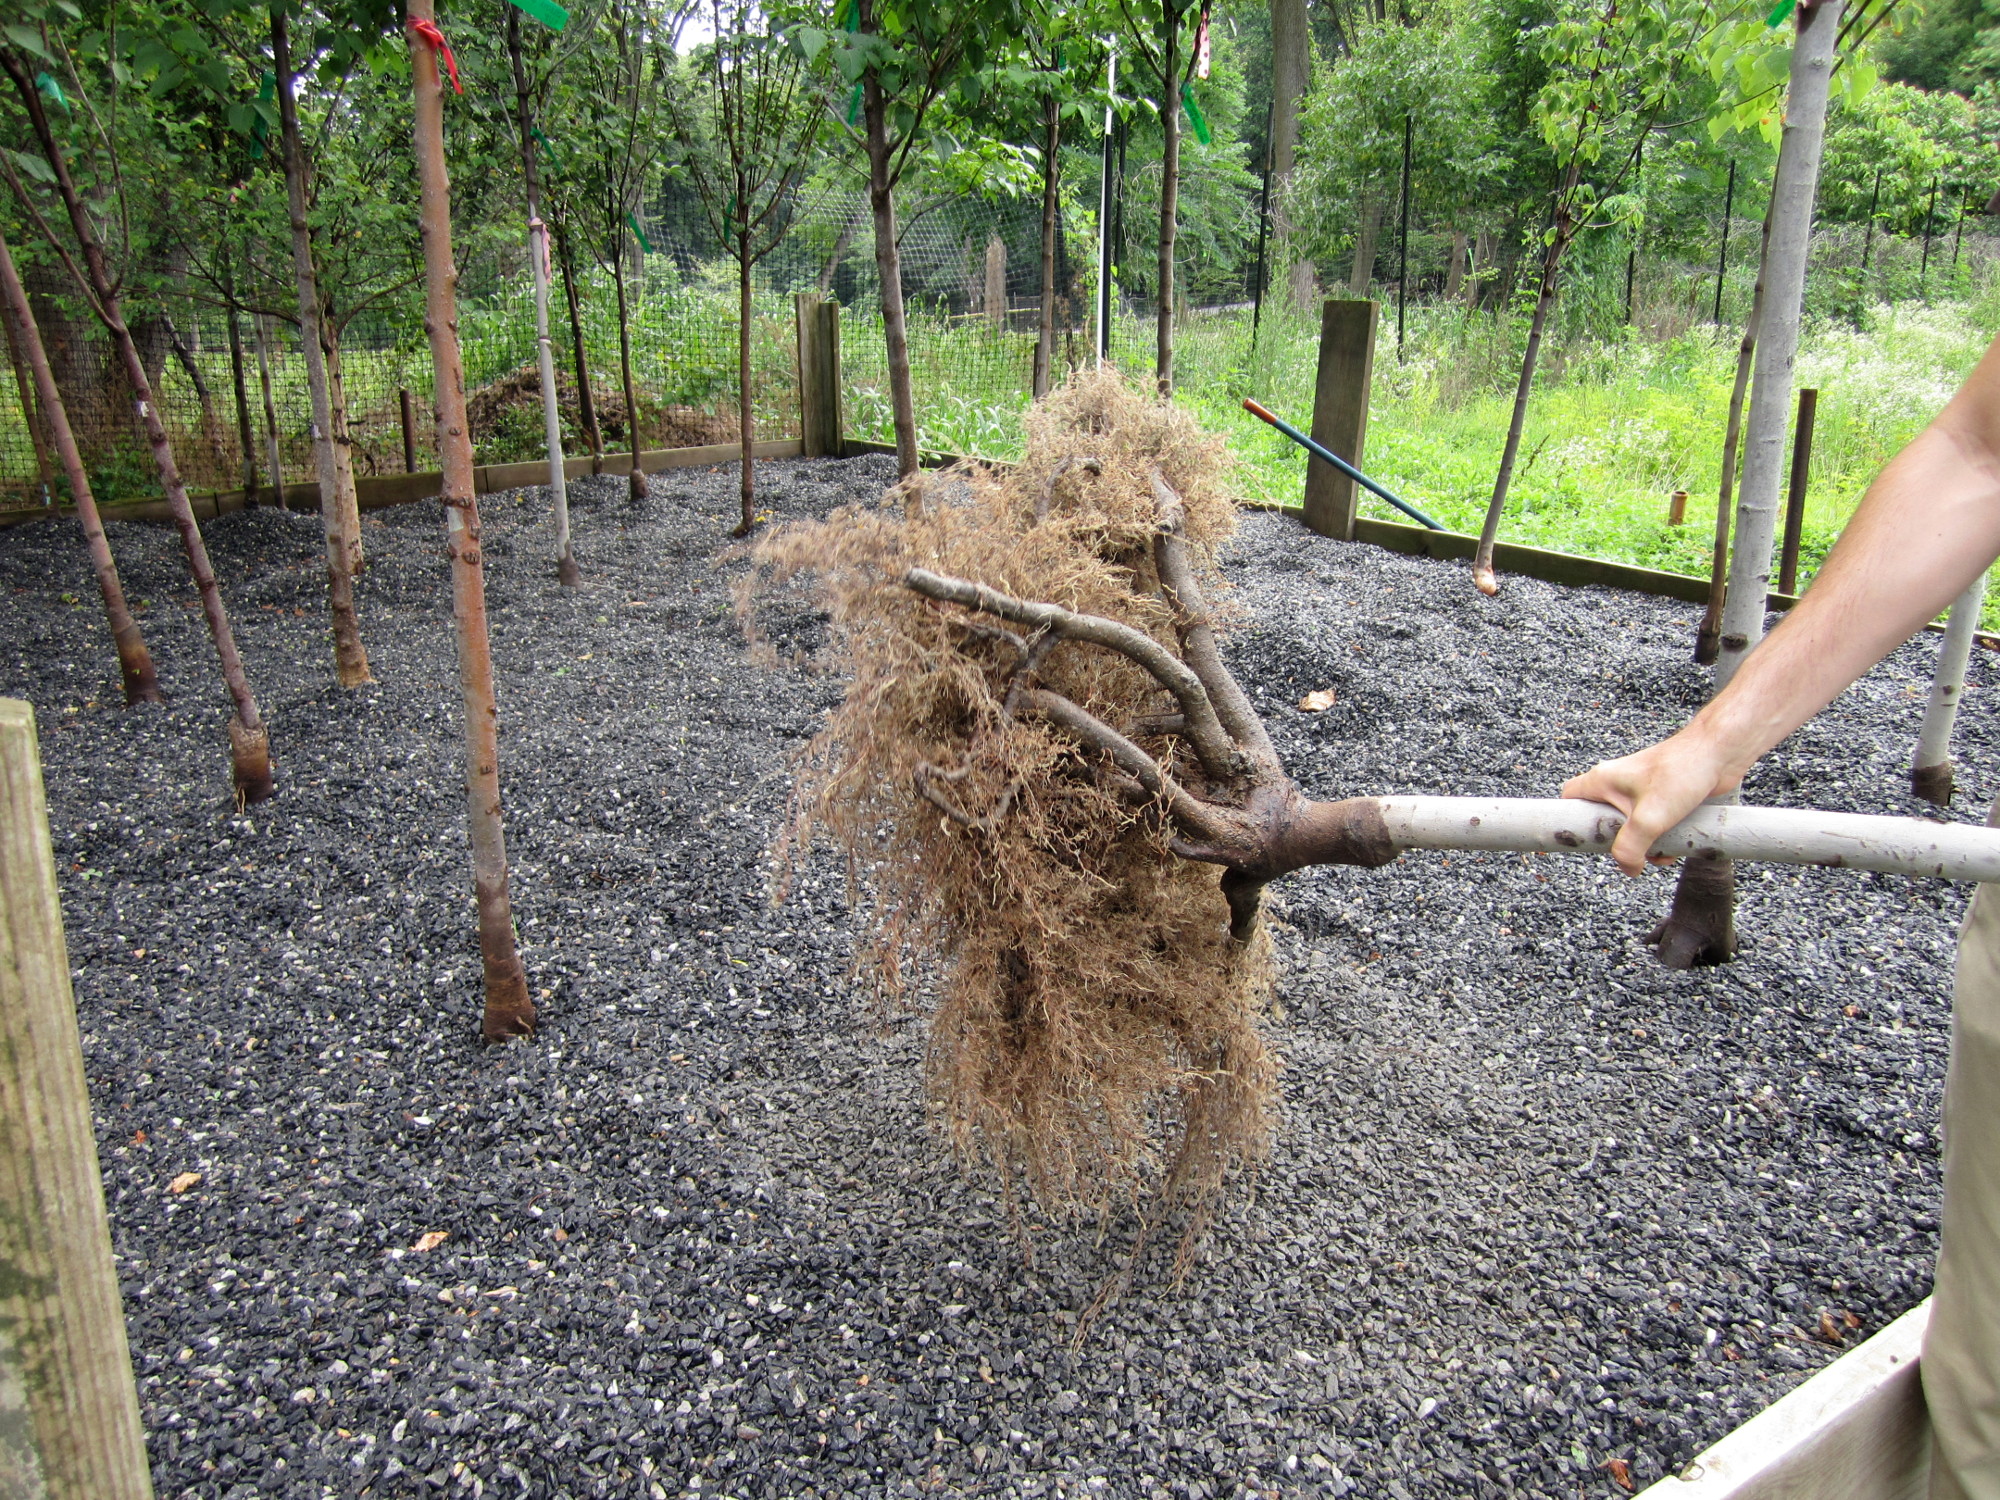
Typically, bare root trees are not inspected at the nursery as they traditionally have been small stock and not often used on projects where landscape architects control the submittal process. However, the advent of the Missouri Gravel Bed (MG Bed) combined with bare root harvested stock is allowing large caliper trees to be incorporated into high value landscapes. An MG Bed is a simple layer of pea gravel 12 to18 inches (30.5 to 46 cm) thick. The bare root tree is planted in the gravel during the dormant season and spray irrigated until needed. At the time of planting the tree is lifted out of the gravel and shipped to the site in a plastic bag, and planted using standard bare root planting methods. Trees up to 10 inches (25 cm) in caliper have been moved with this method.
Selecting bare root trees allows the entire root system to be inspected and manipulated to eliminate girdling roots and buried trunk flare. B&B and container trees can each be bare root planted after the soil is removed at the planting site, or they can be placed in a gravel bed as noted above. Each of these options must be written into the specification in order to have the contractor include the work in the pricing and schedule.
There remains the issue of when is the best time to inspect the root system. Since the process of bare root digging, moving into the gravel bed, and then packaging for transportation to the installing contractor does not include a time when large amounts of stock are out of the ground and visible, the inspection may still have to rely on a random sampling of stock. On the other hand, the bare root / gravel bed option makes random inspection easy once the inspector arrives at the location of the gravel bed. Sample trees can be pulled out of the gravel, inspected and then returned to the gravel.
DIY bare root trees
Trees can be bare rooted at the time of planting. B&B trees and particularly container trees benefit from this practice. For trees that need to be planted in summer and for very large trees adding the step of transitioning the root system in a MG Bed will assure a more successful trans planting process. There are a few species, particularly Oak, that need special consideration, but most species adapt to bare rooting quite well.
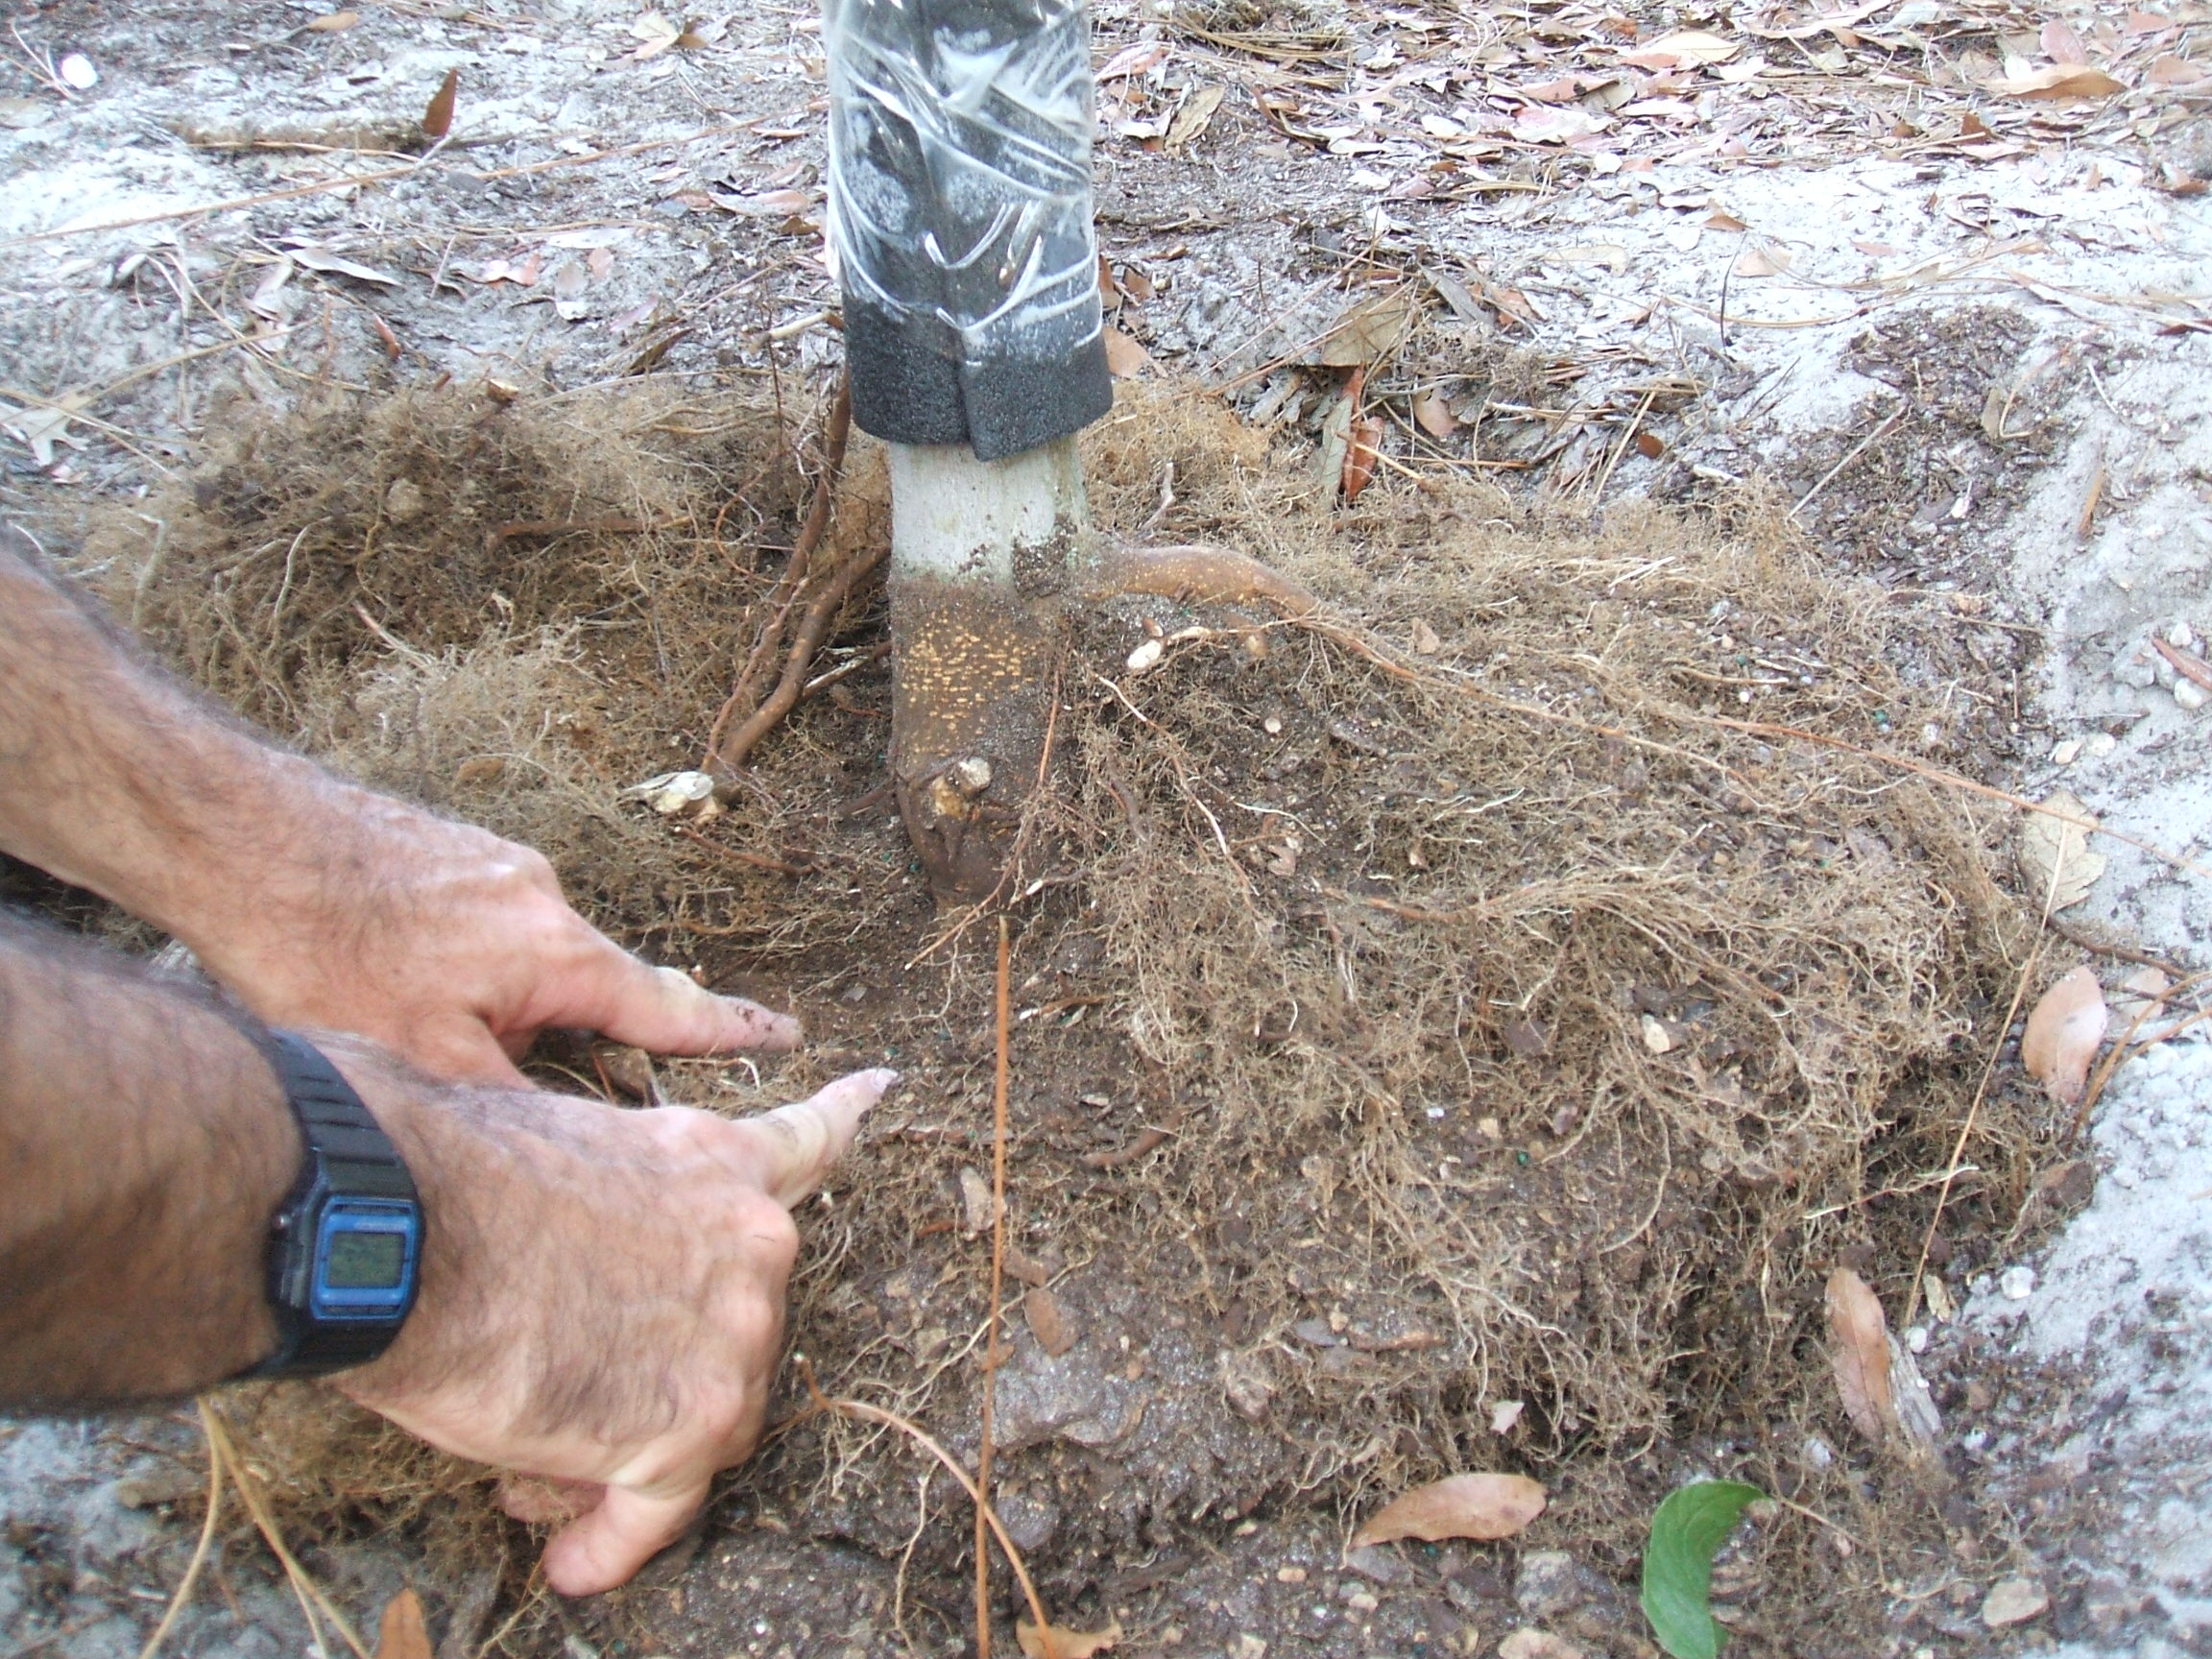
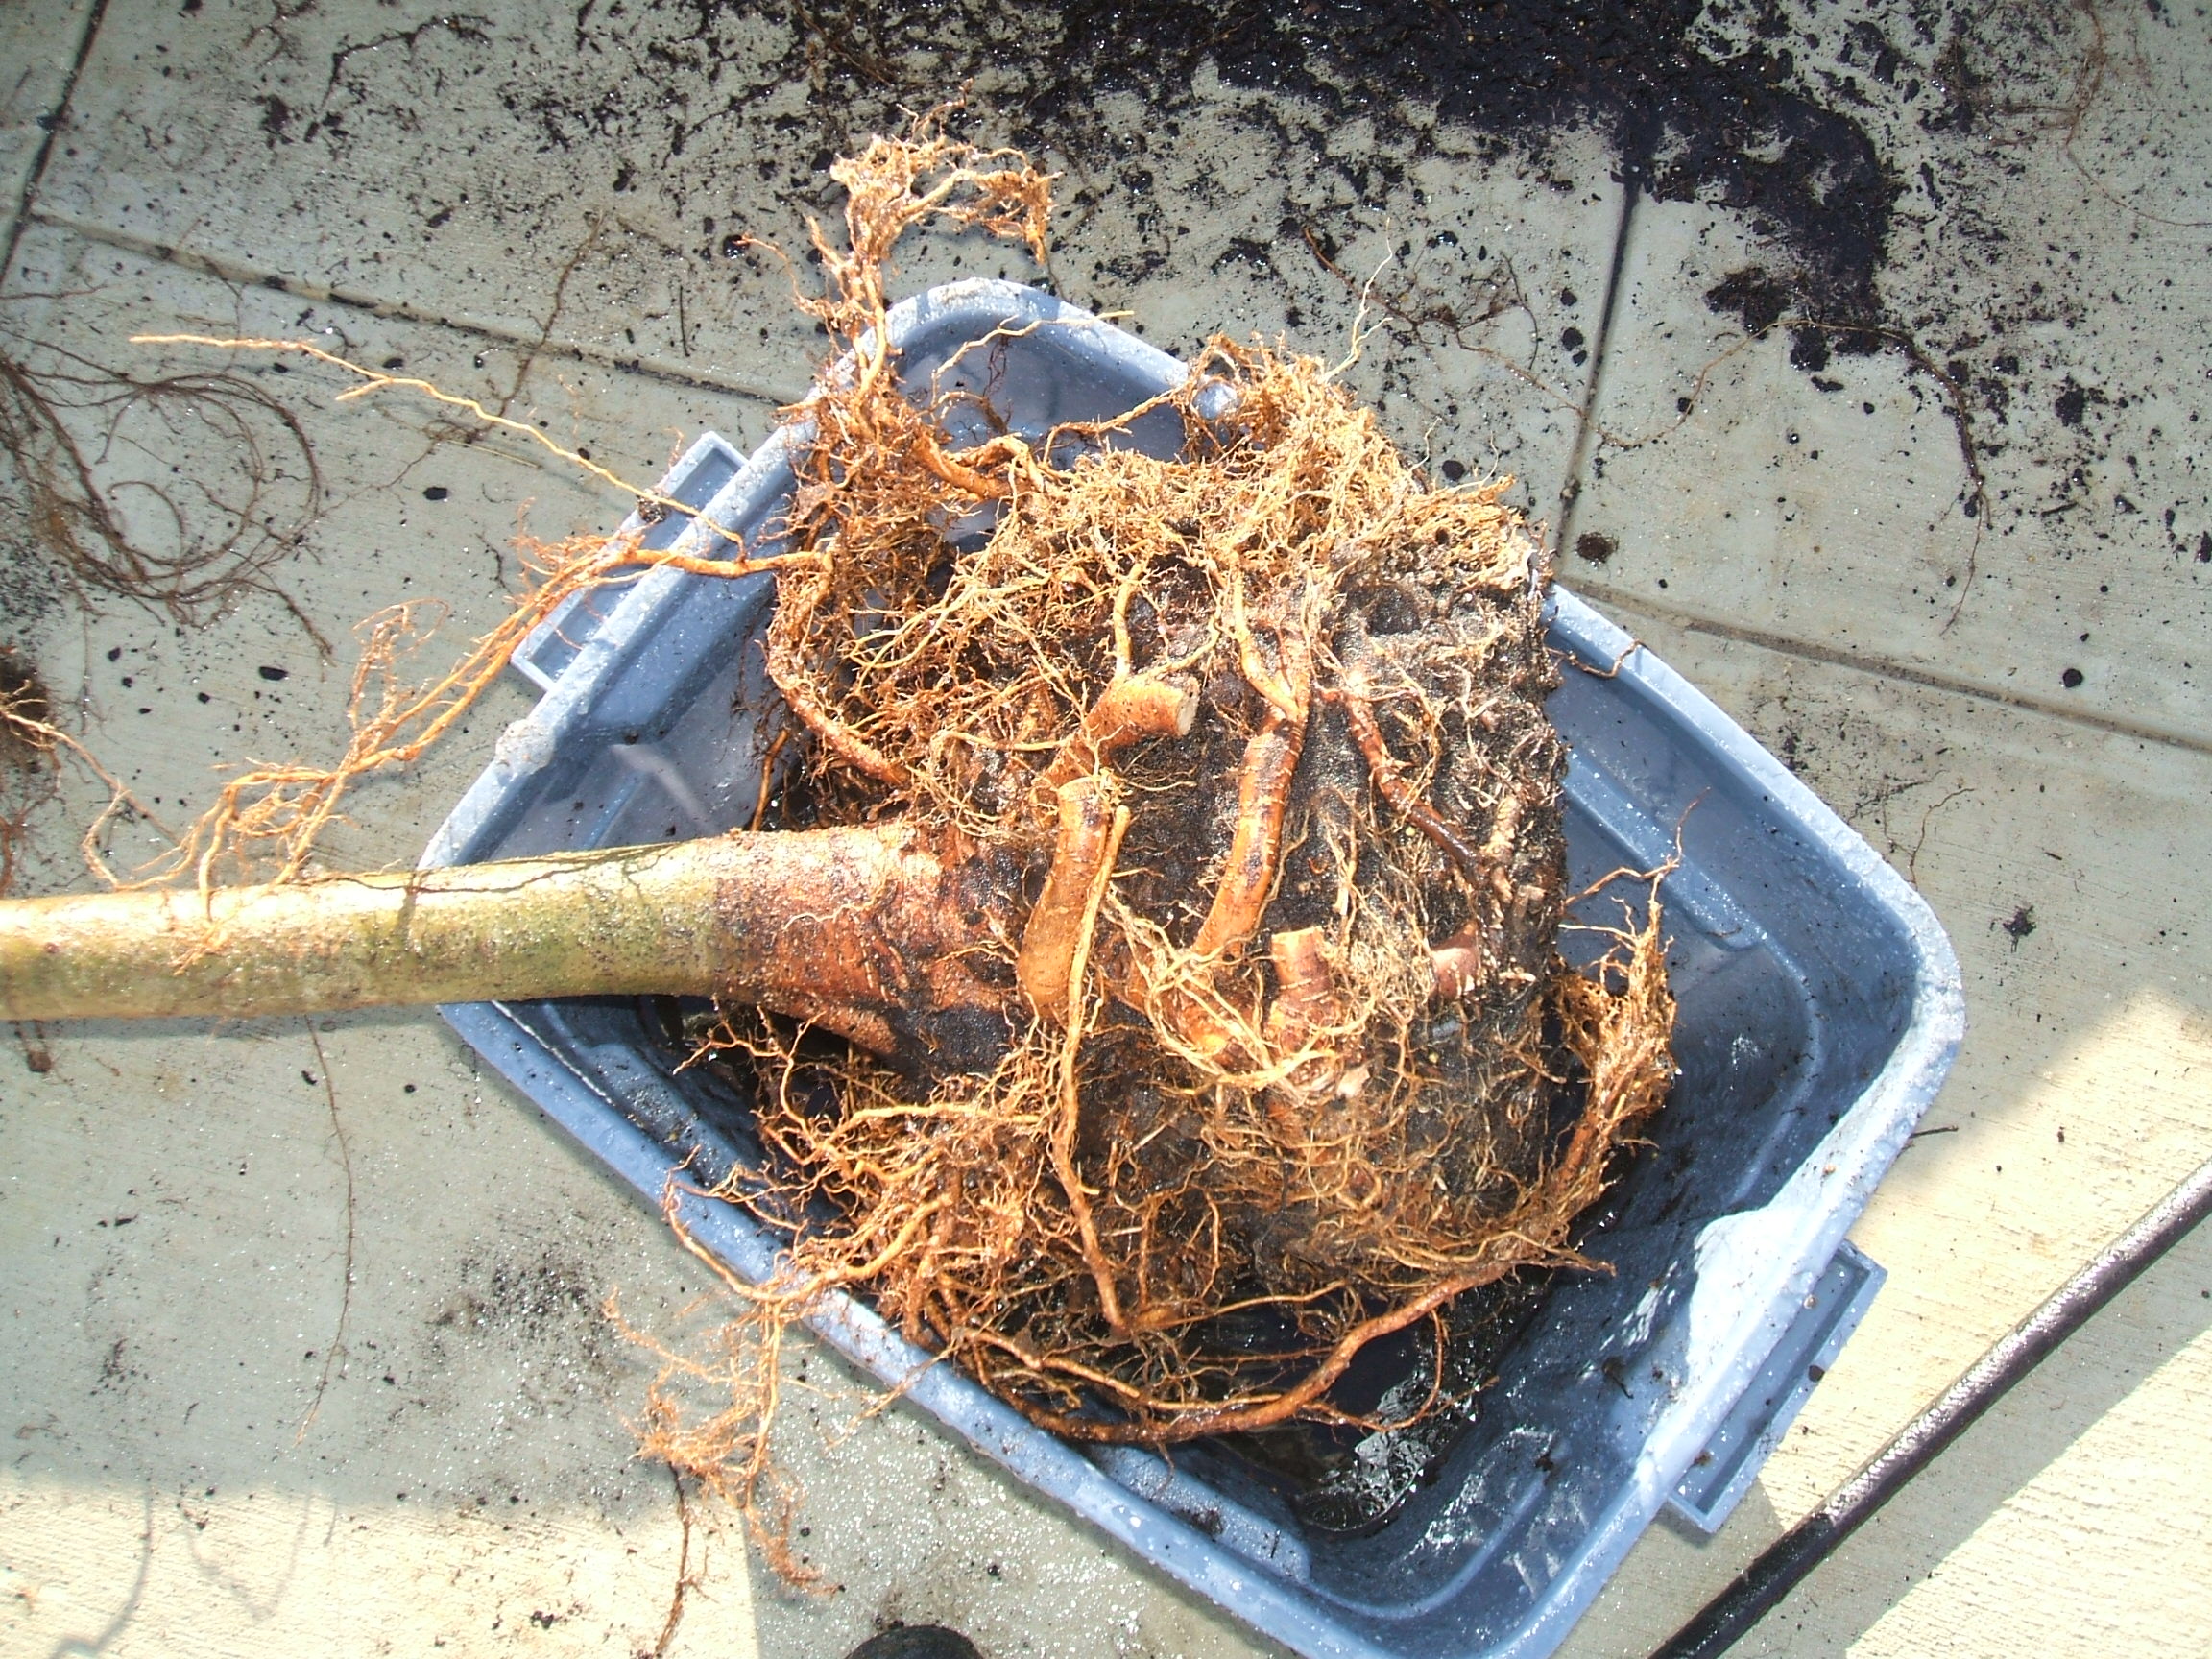
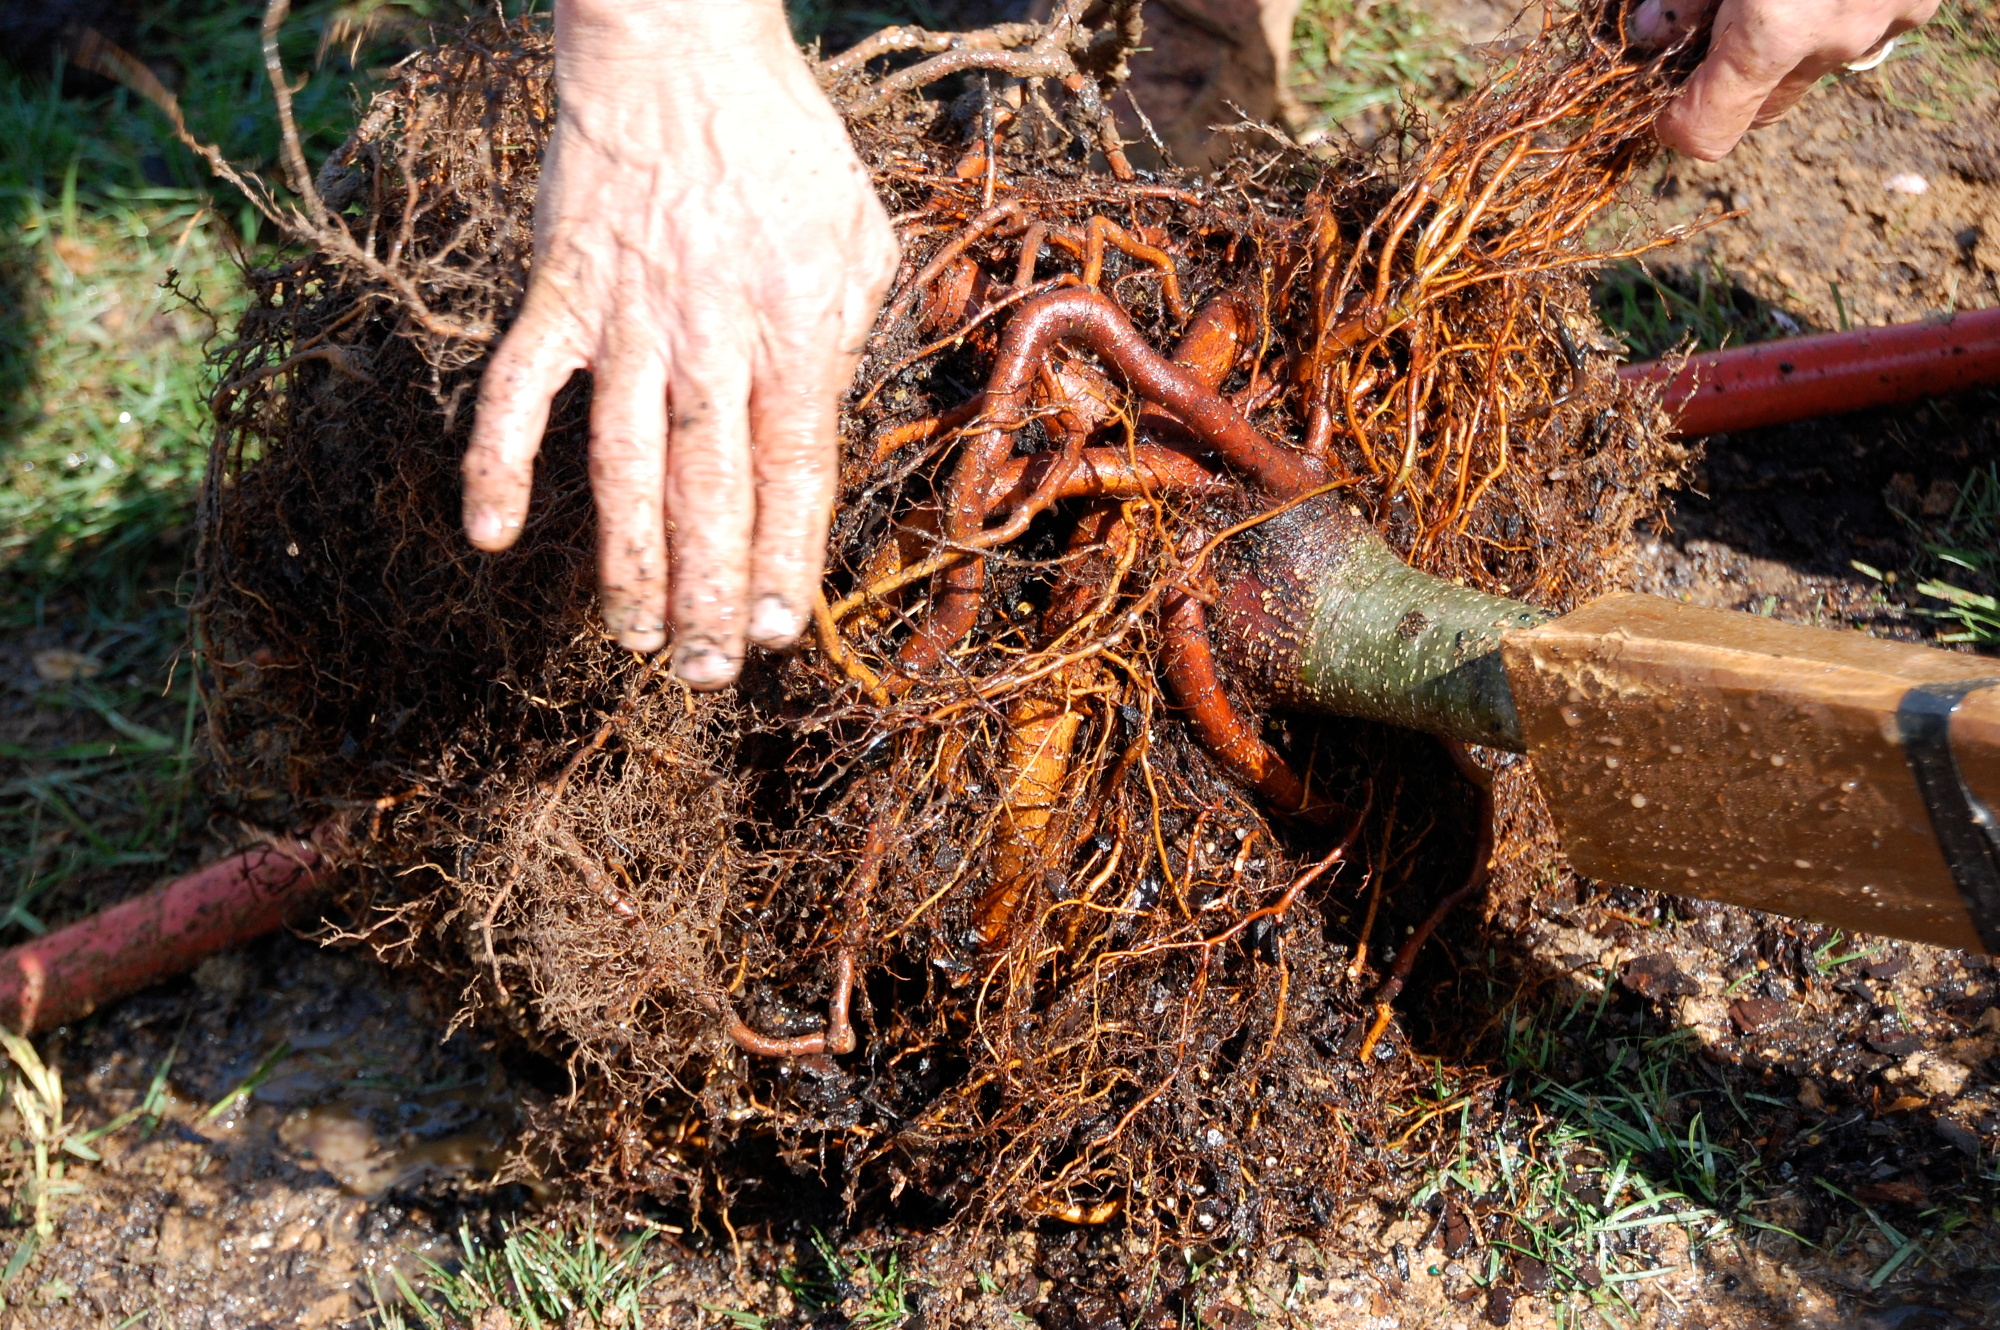
To bare root a tree at the time of planting, start by soaking the root ball in a tub of water, then use a pressure washer or air knife set on the lowest useful pressure to blow out the growing medium. For a few trees you might be able to just pull the root ball apart with hand tools and a garden hose. Girdling roots within the root ball can be cut and roots can be pulled out into the soil to make a wide root plate. This may sound overly aggressive but I have done this for all of the container trees I have planted with excellent results. This eliminates the need for dramatic inspections of the roots at the time of purchase but adds about 15 to 20 minutes to the time it takes to plant each tree.
Bare rooting a container tree may not be practical for many jobs. The contractor must include these modifications in the bid and project schedule. Prohibiting container trees is a reasonable option, but may eliminate many tree species that are only available as container stock. Container trees are typically less expensive than B&B but the added work to correct root defects needs to be factored into the budget.
Conclusion
Successful nursery inspections rely on four elements working together.
- The inspection process must be supported by a good specification that sets reasonable and measurable standards for tree quality.
- The client must accept that improving quality will cost more but return long term benefits by promoting healthier sustainable trees.
- The client, contractor, and nursery must all accept the standards and be willing partners in the process.
- Finally, the landscape architect must have sufficient construction administration fees to undertake the inspections and the technical skills to understand when the plants meet the standards.
Rejection of the root system sends a powerful message to the industry that change must occur. The nursery industry has been allowed to maintain methods that produce defective trees, particularly root defects, precisely because the consumers of their products have accepted them. Invasive root system inspection and branch structure provisions are new to the industry and will take some time for all parties to accept. Landscape architects will have to take the lead in improving the quality of the trees that are installed in their projects. I hope this series (read Part One here) will be a helpful resource in that effort.
James Urban, FASLA, is an expert in urban trees and soils. He is the author or the book Up By Roots: Healthy Trees and Soils in the Built Environment.
Top image: Jill Clardy / CC BY-SA 2.0




Leave Your Comment