After months of design, calculations, and careful planning, construction is starting on your next project. You have spent hours selecting which tree varieties to use, where to place them, and how they will be maintained. Perhaps you have even invested extra time and resources to make sure those trees will have ample soil and water available to them.
However, all this planning can be for naught if your trees get planted incorrectly, or improper maintenance occurs after the project is complete. It is this moment, “the last mile,” that can make or break their chances. Here are some tips to make sure the trees succeed on your next project.
Tree selection
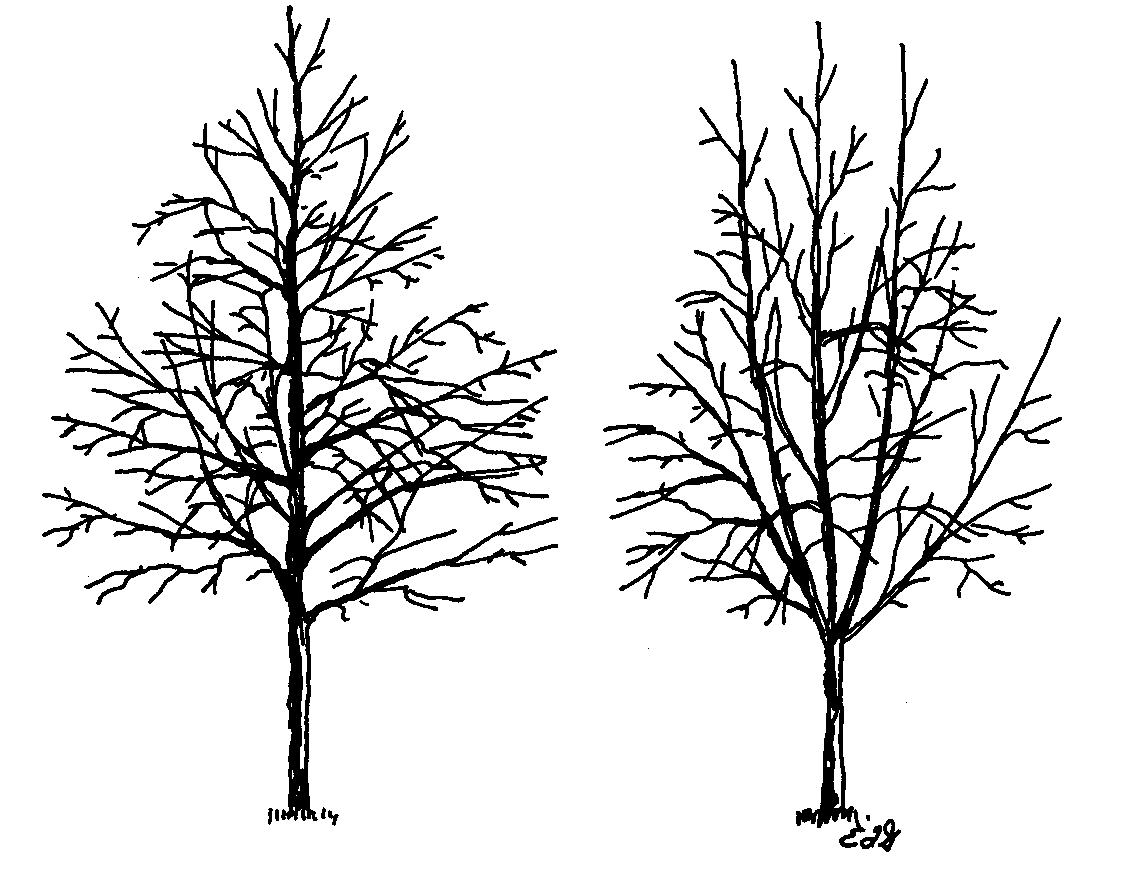
- Choose a tree with a strong central leader (fig. 1)

Figure 1. Credit: Urban Tree Foundation
- Ensure there are no girdling roots
- The tree should not have dead tips or dead wood.
- There should be no obvious wounds or loose bark.
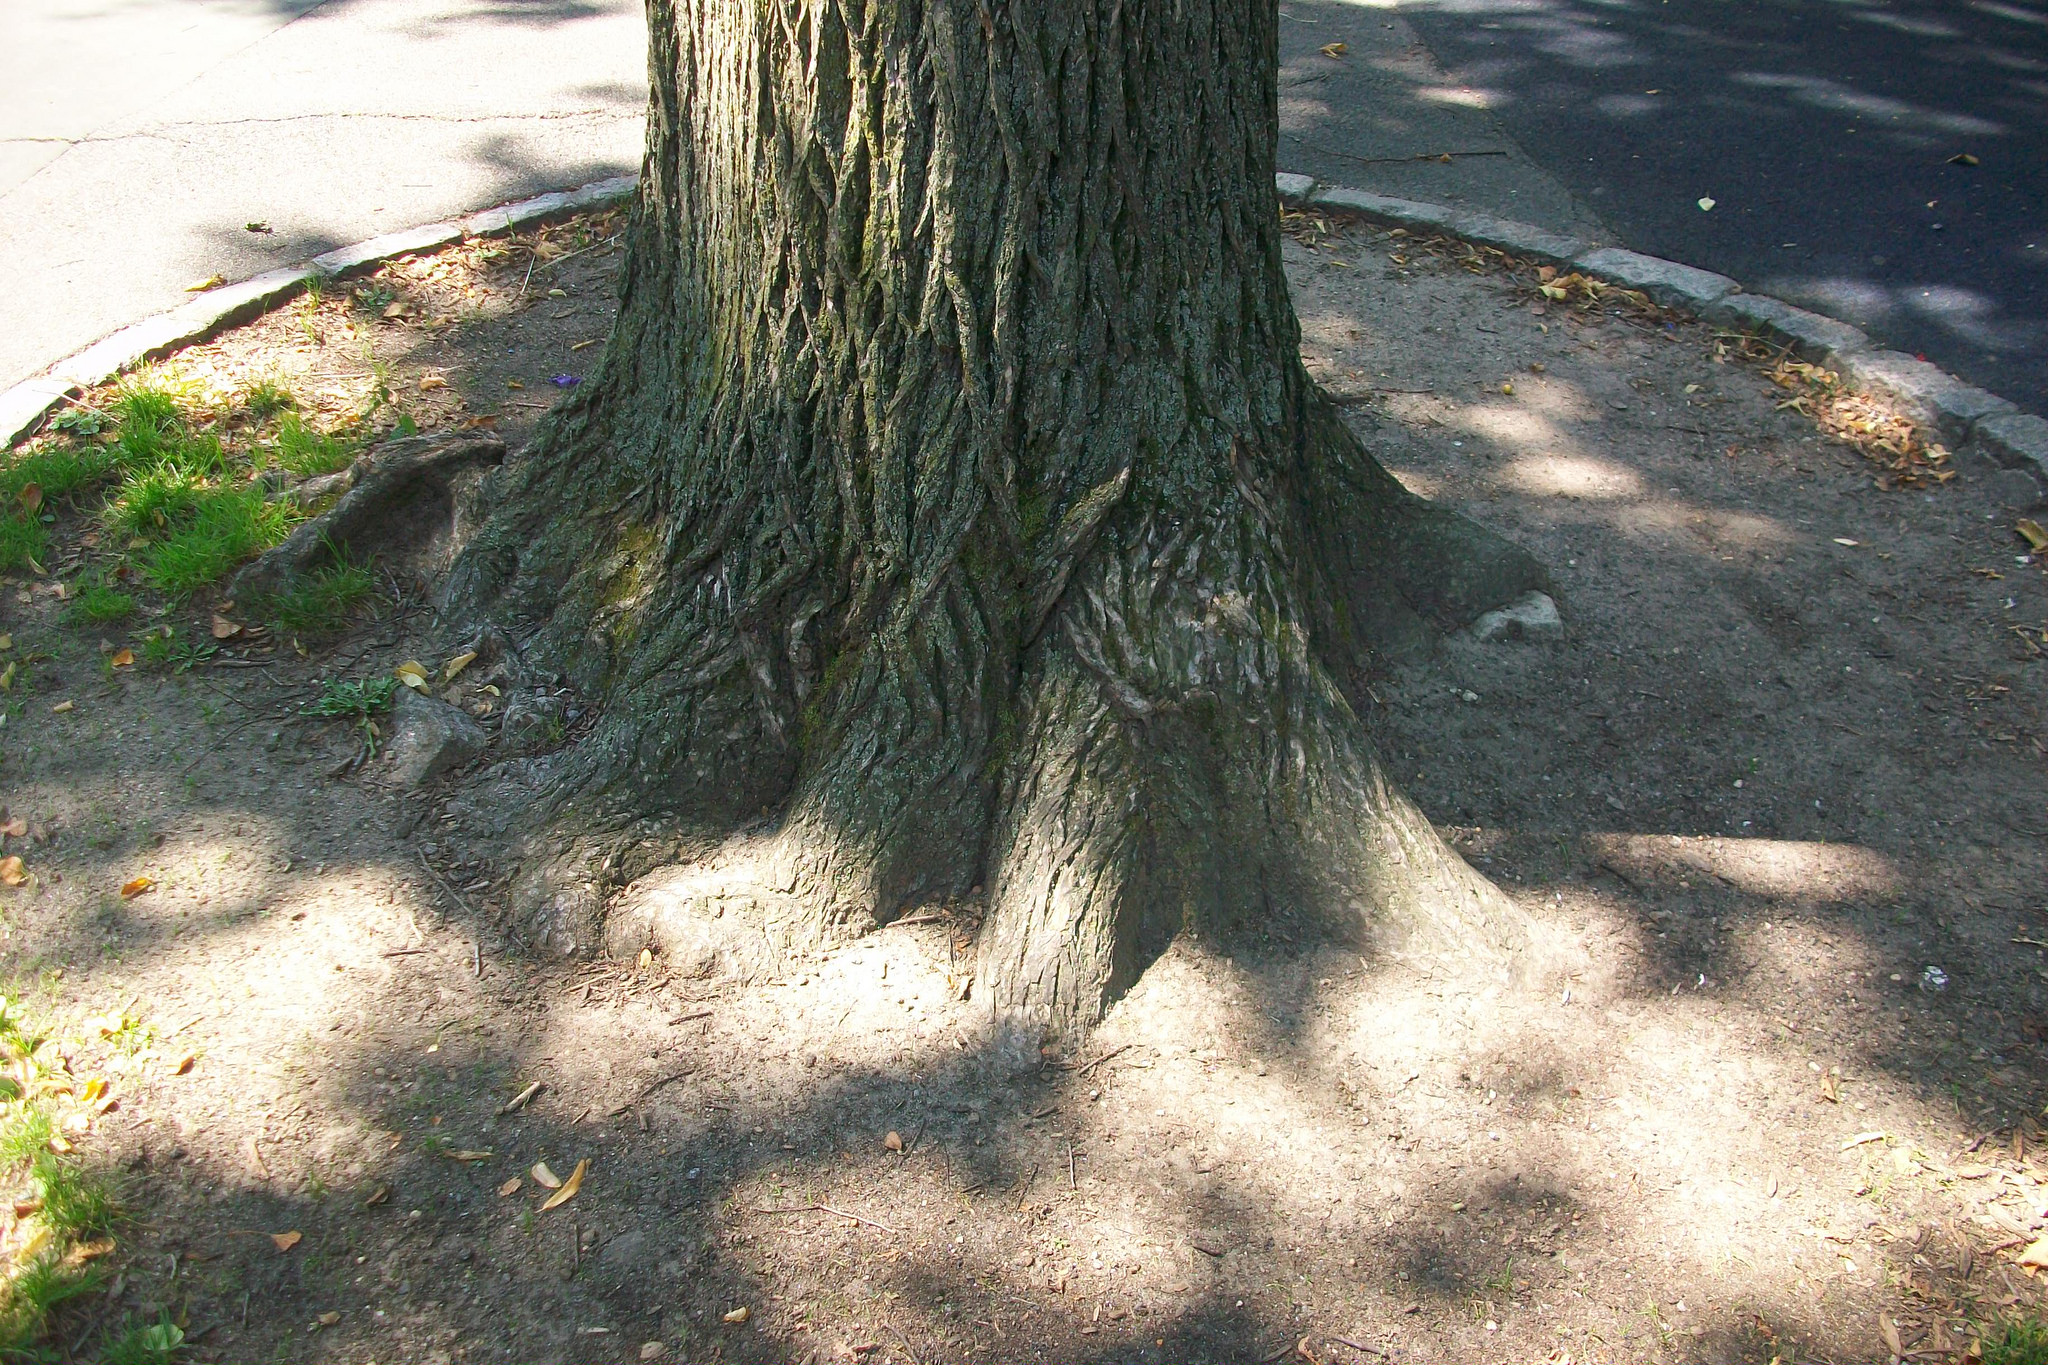
- You should be able to easily see the trunk flare (fig. 2)

Figure 1. Credit: Local Ecologist | CC BY-NC-ND 2.0
- The main anchor roots should form a star pattern – they should not begin to wrap in a circle around the tree.
- Test the stability by grabbing the trunk and gently (but firmly) rocking the tree a bit – you should not be able to move it within the ground.
- Step back and look at the tree:
- Assuming the tree is leafed out, you should not be able to see through the canopy.
- Proportionately, 60 to 75 percent of the tree should be trunk before it begins branching out. Low branching trees are more prone to catastrophic damage.
- The leaves should be intensely green. There should be no yellow or purple leaf margins or veins (unless this is a distinctive characteristics of the tree).
Planting guidelines
- Forgo tree grates and spend your money creating a larger soil volume for the tree. Tree grates can damage and girdle trees over time, and are expensive. Invest in soil!
- Plant a tree that is the smallest diameter the client will accept. This will give the tree a better chance of thriving in its new environment.
- If the tree is a balled and burlapped tree, 1.5 to 2.5 inches (38.1 mm to 63.5 mm) caliper is ideal. Trees over 4 inches (101.6 mm) caliper should be avoided.
- If the tree has been grown in a pot or other container, a larger tree may be used.
- Container-grown trees should have any circling roots cut off.
- The planting hole should be wide, not deep. A good hole will be saucer shaped, and be three times the width of the root ball.
- Provide a firm base for the root ball.
- Amending the soil in the planting hole is not required, but bio char, bio solids, compost, or some combination of the three will give your tree a boost.
- The top root ball should stick out of the ground the same amount as the tree caliper. For example, a 2.5 inches (63.5 mm) caliper tree should stick out of the ground 2.5 inches (63.5 mm). This allows for settling. The vast majority of trees I have seen on projects get planted too deeply, preventing the tree from thriving and, in some cases, killing the tree.
- The tree should be staked for the first couple growing season. Ensure the stakes are removed after this point as to not inadvertently interfere with the tree’s growth.
- It is recommended to add ½” of compost over the top of the root ball.
- Mulch should be spread over the planting area. It should be 0.5 to 1 inch (12.7 mm to 25 mm) deep over the root ball, and then increase to 3 inches (76.2 mm) deep around the root ball. This forms a slight saucer to collect moisture. The wider you can mulch around the tree, the better, but it should never be less than 3 feet (0.9 m).
Maintenance
- A slow release watering bag or ring is recommended.
- In the tree’s first season, water the tree immediately next to the trunk, as that is where the roots are. As the tree grows in subsequent years, water out to the drip line or beyond where possible. (See “How Much Should You Water Your Tree?” for minimum watering guidelines)
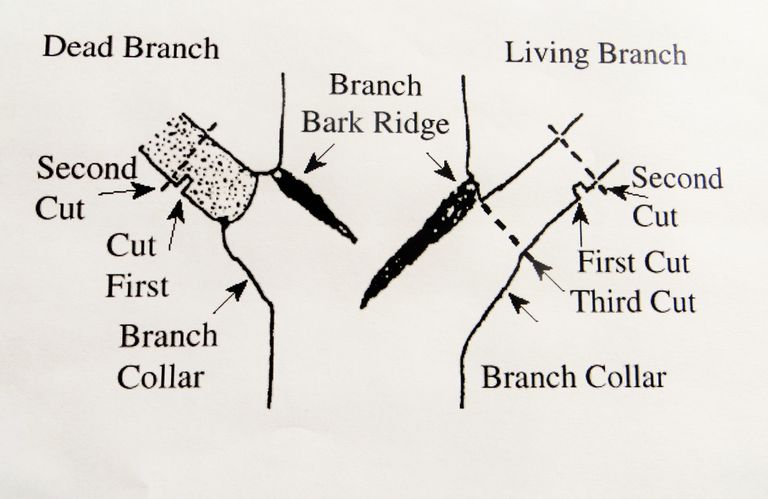
- Follow the Shigo pruning method (fig. 4), which is a 3-step process:

Fig. 4. Image credit University of Arizona School of Plant Sciences
- The first cut is a shallow notch made on the underside of the branch, up and outside but next to the branch collar. This should be .5 to 1.5 inches (12.7 mm to 25 mm) deep depending on the size of the branch. This cut will prevent a falling branch from tearing the stem tissue as it pulls away from the tree.
- The second cut should be outside the first cut. You should cut all the way through the branch, leaving a short stub. The bottom notch stops any stripping bark.
- The stub is then cut off just outside the upper branch bark ridge and down just outside the branch collar. It is not recommended by many arborists that you paint the wound as that can impede healing and, at best, is a waste of time and paint.
By following these basic guidelines, you will have done everything in your power to give your trees the best chance at survival. Trees are an important part of our communities – give them the best possible chance at thriving where they are planted!
Special thanks to Peter MacDonagh for his expert knowledge on trees and tree planting.


Thorough advice, very well done. I would also like to add that if you live in a hurricane-prone area most oak trees will do well withstanding the winds.
Hope this helps someone!
Best, Cyrus