This is the second of a two-part series about urban soil assessment and reuse. Read part 1 here.
While the types of questions one might ask about urban soils are somewhat similar to the questions an agricultural soil scientist might ask about farm soils, the methods to get information is dramatically different. Urban soils are either often paved over or so compacted that digging casual pits is physically difficult. Making destructive soil investigations that may damage finished surfaces or utilities, is expensive or simply not permitted. Urban soil conditions also change rapidly over small distances, both horizontally and vertically. Traditional soil investigations that rely on a series of a few soil pits over large areas are not sufficient, and digging enough pits is not practical, in the built environment.
When agricultural soil description methods are not attainable in urban settings, a series of nontraditional investigative methods when taken together, can provide reliable results. In exchange for soil descriptions, urban soil assessment seeks to understand how damaged are the soils, to what depth, and what modifications need to be specified to make them support the plants proposed for the project.
The goal is to influence the plan design to avoid putting plants into spaces where there are not soil resources (or a budget to correct problems). By understanding the problems at the beginning of the design process, designs can be developed that work with the soil limitations.
The set of tools to be used includes:
Site and area development history
Urban soil disturbances are closely linked to the previous development. How many different buildings and uses were at the site since it was last a farm or forest? How well is that development documented? In many places, the data about construction and soil disturbance goes back a century or more (on the East Coast of the United States, information from 1870 onward is often well documented and reasonably accessible). I once used a plate of the 1640 charter of two churches in Boston to find the original soil profile on a site. Other sources include historic maps, “Sanborn” insurance maps, photographs, building permits, and utility plans.
Many suburban areas developed after World War II have old United States Department of Agriculture (USDA) soil surveys that show pre-development soil conditions. Some of these resources go as far back as the 1930’s depending on location and can be clues to the type of soil you might expect to find.
Geotechnical reports
Most commercial buildings have soil borings that show deep soil conditions that are full of information on fill soils, drainage, and soil stability and soil type. Review these to understand the history of the soil conditions on the site – and how they might be impacting what is there today.
Existing plantings
The type and condition of trees on the site and adjacent sites indicates the soil’s ability to support plantings. Having a good understanding of stress signs in plants helps to identify problem soils. Even weed species or lawn quality indicate different soil conditions.
Topography
The topography is a good indication of past grading and soil disturbance. Cut and fill slopes, mounds in areas of naturally flat land, or very flat planar surfaces resulting from engineered contours that are different from the natural contours of pre-development land forms.
Excavations
Construction work at the site or an adjacent property offers an opportunity to observe soil conditions and can be a significant source of information. Soil samples can often easily be taken from these locations, even if off site.
Web satellite images
Satellite imagery such as Google Maps shows how plants, trees and lawns are growing at and around the site. At a city scale, patterns emerge that can reveal changing soil conditions.
Interviews
There are always people who are familiar with the site’s soils, drainage, and plant performance. Contractors, property managers, residents, and city officials can be tapped for their knowledge. This may be as simple as talking to the construction supervisor at a construction site adjacent to the project, or the landscape maintenance company whose truck is at a neighboring property.
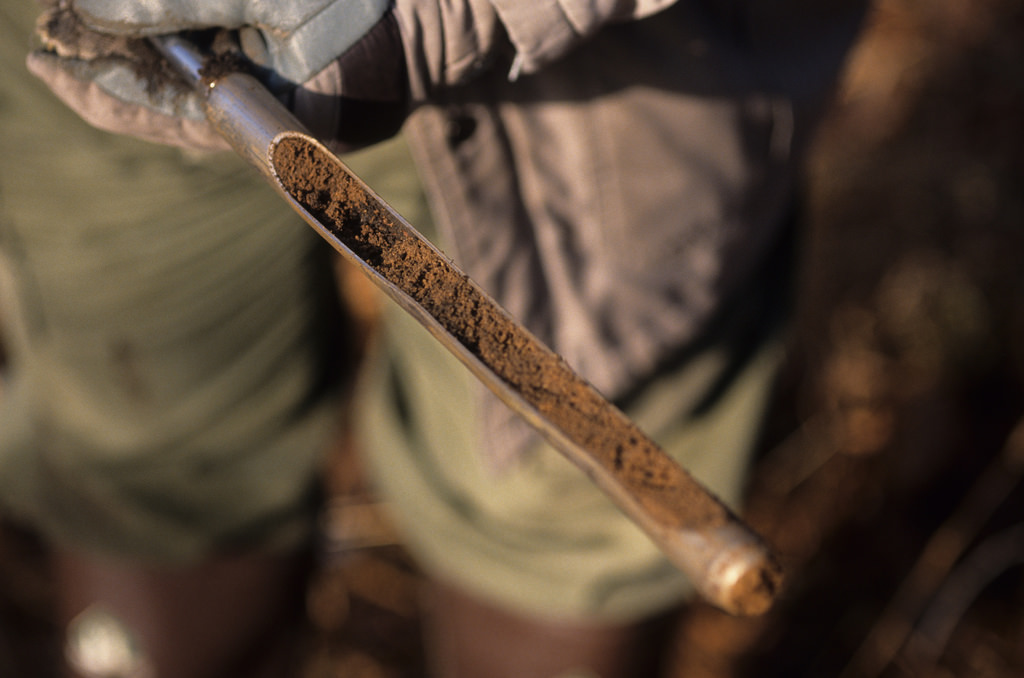
Soil test pits
All the above ideas gather bits of data that indicate trends in soil conditions. This work should be performed prior to starting to dig soil test pits.
Digging and collection data at urban sites is hard work, so limiting the number of auger holes is good practice. Doing remote data collection first makes it easier to identify the best places to spend time digging. A small hand soil auger called a Dutch Auger is an excellent device to dig in urban soils. A complete description on this technique can be found in Up By Roots.
Compaction assessment
For practical reasons compaction, particularly in paved areas, is typically assessed from the collection of many of the above techniques rather than bulk density testing. Surface compaction and deeper soil compaction must both be considered.
Trees growing in small holes are an excellent indicator of soil compaction under pavements. Cracking, settlement, or lifting of pavement reveals if roots are growing right under the paving or if soil settlement is causing paving failure. Footprints of previous structures, parking and roads, fill areas, or temporary contractor staging areas are places where excess soil compaction may be found.
Soil lab testing
During the auger phase, soil samples can be collected and sent to a soil lab for testing chemistry, pH, soil organic matter (SOM) and particle size distribution. At sites where development history suggests looking for hazardous chemicals, a specialty firm will need to be employed as this is beyond the expertise of site designers.
Bringing the data together
Once the basic information is known, the soils limitations can be described and mapped. Describing limitations sets the stage for developing solutions during the design and construction phases. These limitations include:
- Compaction
- Drainage
- Soil organic matter
- Chemical and pH
- Debris
- Difficult soil textures
- Soil volume
- Physical limitations such as site access, tree preservation and/or utilities
- Process limitations such as project schedule, regulations and/or budget
The mapping exercise should show these different limitation areas, including combinations of multiple types of limitations. On larger projects a soils report may be needed to document and support soil remediation. On smaller projects a simple sketch may be sufficient for use by the design team to inform design directions and construction document preparation.
The information gathered will also guide the development of a planting soils and drainage plan, as well as plant choice to be adaptable to the existing or restored soil conditions.
The above techniques are discussed in more detail in Part 1 of Up By Roots. This book should be the desk reference for any questions that arise during the process. Like any new skill, practice and further learning will improve the accuracy and usefulness of the techniques. For more information about how these skills and processes might apply on an actual site, read this article.
James Urban, FASLA is the principal of Urban Trees + Soils and the author of “Up By Roots” (ISA).
Wisconsin Department of Natural Resources / CC BY-ND 2.0


Leave Your Comment