Okay, we know you have done a lot of work. You have analyzed your site and have picked the best tree species for your area, provided the trees with the optimal volume of planting soil, selected the best specimen from the nursery, and made sure it has arrived on-site in great condition.
We think what you are doing is great for so many reasons. We want all this hard work to result in long-term success in growing big, healthy trees. And because long-term success is impacted greatly by how trees are planted and maintained for establishment, we’ve compiled a checklist of current planting and maintenance standards for trees and are providing a planting detail that you can use on your plan set.

Throughout this post we will reference work done by Edward F. Gilman and his team at the University of Florida. Their website has a wealth of information based on current research and standards. We also will reference the recently-issued ANSI standards for Planting and Transplanting. Take a look!
Our recommendations are largely based on Gilman’s planting techniques and the ANSI standards. You will see that many of these techniques have been industry standards for years. However, we would like to point out the items that are in bold, as they may be a bit newer standards that should be recognized.
:: Pick the right tree for the right place and look for conflicts that would interfere with its growth (we recommend doing this during the design and planning phase of the project)
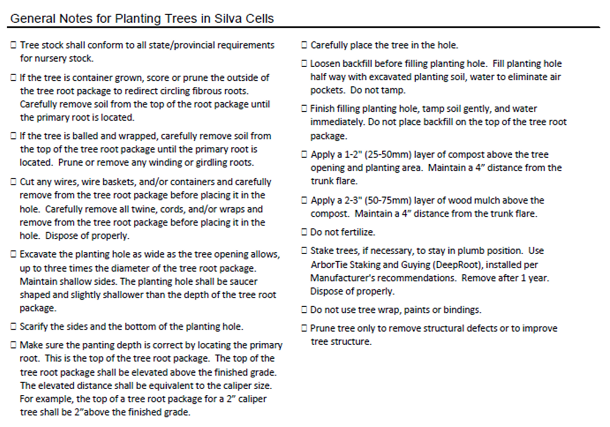
:: Tree stock shall conform to all state/provincial requirements for nursery stock.
:: If the tree is container grown, score or prune the outside of the tree root package to redirect circling fibrous roots. Carefully remove soil from the top of the root package until the primary root is located.
:: If the tree is balled and wrapped, carefully remove soil from the top of the tree root package until the primary root is located. Prune or remove any winding or girdling roots.
:: Cut any wires, wire baskets, and/or containers and carefully remove from the tree root package before placing it in the hole. Carefully remove all twine, cords, and/or wraps and remove from the tree root package before placing it in the hole. Dispose of properly.
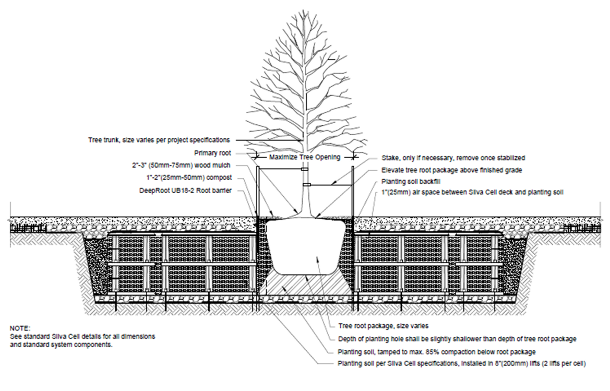
:: Excavate the planting hole as wide as the tree opening allows, up to three times the diameter of the tree root package. Maintain shallow sides. The planting hole shall be saucer shaped and slightly shallower than the depth of the tree root package.
:: Scarify the sides and the bottom of the planting hole.
:: Make sure the panting depth is correct by locating the primary root. This is the top of the tree root package. The top of the tree root package shall be elevated above the finished grade. The elevated distance shall be equivalent to the caliper size. For example, the top of a tree root package for a 2” caliper tree shall be 2”above the finished grade.
:: Carefully place the tree in the hole.
:: Loosen backfill before filling planting hole. Fill planting hole half way with excavated planting soil, water to eliminate air pockets. Do not tamp.
:: Finish filling planting hole, tamp soil gently, and water immediately. Do not place backfill on the top of the tree root package.
:: Apply a 1-2″ (25-50mm) layer of compost above the tree opening and planting area. Maintain a 4” distance from the trunk flare.
:: Apply a 2-3″ (50-75mm) layer of wood mulch above the compost. Maintain a 4” distance from the trunk flare.
:: Do not fertilize.
:: Stake trees, if necessary, to stay in plumb position. Use ArborTie staking and guying material (from DeepRoot), installed per Manufacturer’s recommendations. Remove after 1 year. Dispose of properly.
:: Do not use tree wrap, paints or bindings.
:: Prune tree only to remove any structural defects or to improve tree structure.
Once your tree is planted properly, it is important to maintain it through the establishment period. This means providing adequate water and soil amendments (surface applications of compost and mulch) to the tree. The establishment period varies from tree to tree and is determined by a variety of factors. Ideally, this maintenance will occur for three years. During this time, trees will benefit from irrigation during the growing season and re-application of compost and mulch as necessary.
:: Add water as needed for establishment and ongoing maintenance.
:: Replenish compost and mulch as needed.
It is important to monitor the moisture level in the soil and current weather patterns to determine how much irrigation your new tree needs. Gilman recommends that plants of varying nursery stock size get the following amount of water for a vigorous tree, but notes that irrigation should never be applied if the soil is saturated.
| Size of Nursery Stock | Irrigation for Vigor |
| Less than 2 inch caliper | Daily for two weeksEvery other day for 2 months andWeekly until established |
| 2-4 inch caliper | Daily for 1 monthEvery other day for 2 monthsWeekly until established |
| Greater than 4 inch caliper | Daily for 6 weeksEvery other day for 5 months Weekly until established. |
Make sure to check out DeepRoot’s tree planting detail and to review your planting specifications to ensure that your trees are properly planted and maintained.

We also recommend using a certified arborist to consult on any of your projects. Thanks again for all of your hard work!*DeepRoot recommends an application of compost below the mulch to balance the carbon/nitrogen ratio and provide nutrients to the tree and soil microbes.
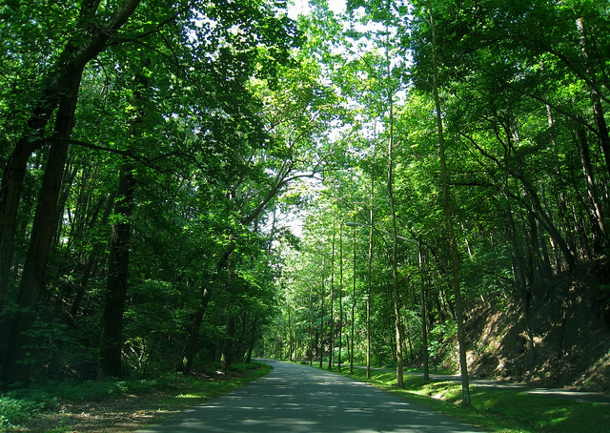
Image: Jennuine Captures


I thought it was interesting that you shouldn’t fertilize right after you plant the tree. Watering right away makes sense, but I thought fertilizer would give it a little extra help. It’s a good thing I read this, because we are going to plant some trees when it warms up a little more. Thanks for the heads up!